How to Make a One-Piece Silicone Rubber Block Mold
 This step-by-step mold making tutorial shows you how to make a simple,
one-piece silicone block mold of a small, decorative object.
The Basics:
- Block molds are generally the simplest type of mold.
- They usually require more rubber than other methods (like blanket molds).
- They are made by pouring liquid rubber into a containment area around the model (or “master”).
- These containment areas can be made from a variety of objects (melamine-laminated particle board, PVC pipe, plasticine clay sticks, UHMW polypropylene, plywood, Sonotubes®, foam core, plexiglass, and much more).
- In our product line-up, you can select from one of the following mold material options: polyurethane rubber, tin-cured silicone rubber, or platinum-cured silicone rubber.
Supplies & Tools Needed to Complete this Project:
- A Model
- PlatSil® 73-40 Platinum Silicone Mold Rubber (or other mold rubber)
- Pol-Ease® 2500 Release Agent
- Brush
- Plasticine Clay or Hot Melt Glue
- Melamine-laminated particle board (or other containment area material)
- Screws
- Drill (to create vent hole)
- Measuring Tape
- Mixing Container & Mixing Tool (e.g. Pails & Stainless Steel Spatula)
- Digital Scale
- Level
- Personal Protective Equipment
Always review product safety data sheets before use.
Step One: Select Containment Area
In this case, melamine-laminated particle board was used as the “mold box” material. The mold box walls were screwed together and placed on top of a base board. Sometimes, a mold strap is used to hold all of these pieces together.
If the mold box is not going to be used to support the mold during the casting process, make sure that the rubber is thick enough between the model and mold walls so that it doesn’t deform when filled with casting material. Generally, it should be at least ½” on all sides [Figure 1]. Also, make sure that the mold box is tall enough to accommodate the appropriate mold height – at least ½” of rubber above the model.
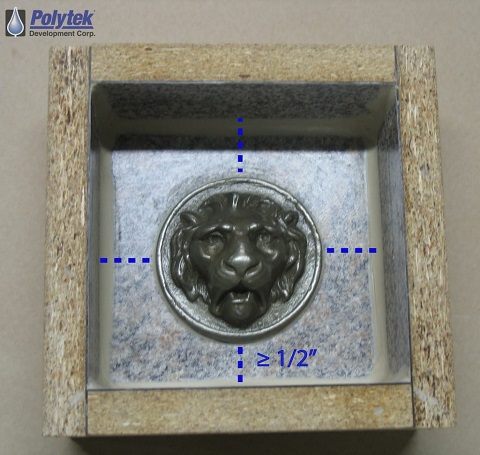
Figure 1: Minimum of ½” of space on all sides of model
Step Two: Secure Model to Base
Securely fasten (e.g. screw or glue) the model to the base board.
If the model is not secured, the poured rubber may leak beneath it and it may begin to float.
NOTE: If the model is porous (e.g. plaster, wood, stone, masonry, pottery), drill a vent hole in the base board underneath the model to allow air to escape [Figure 2].
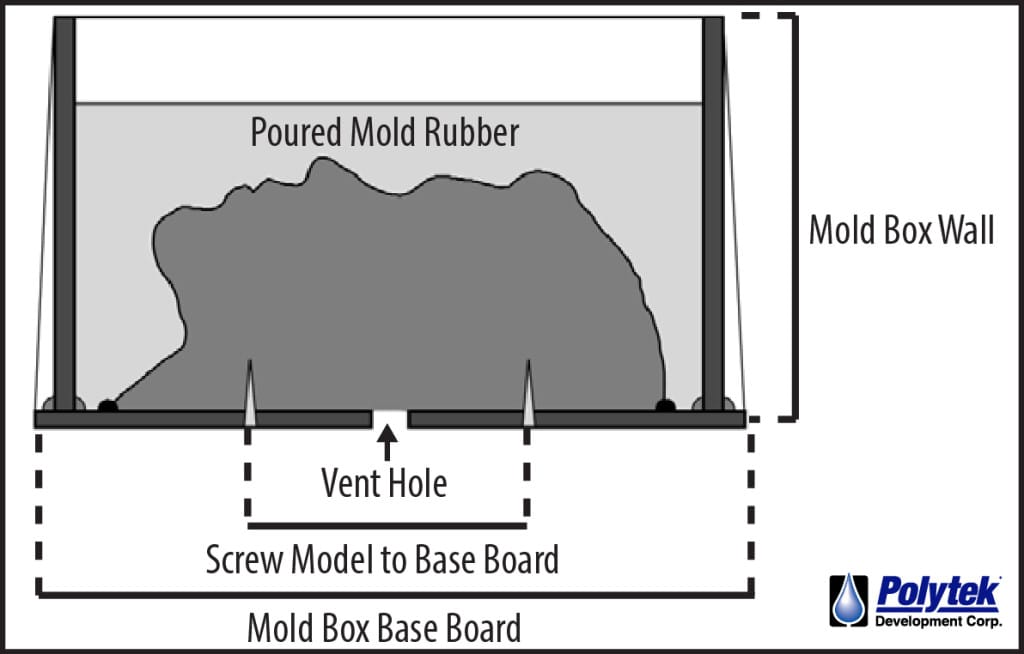
Figure 2: Vent the base board when working with a porous model
Step Three: Seal the Mold Box
To help prevent rubber from leaking out of the mold box, seal the interior edges (between walls and between walls and base board). Warmed plasticine clay was used for this process [Figure 3]. Hot melt glue is another option.
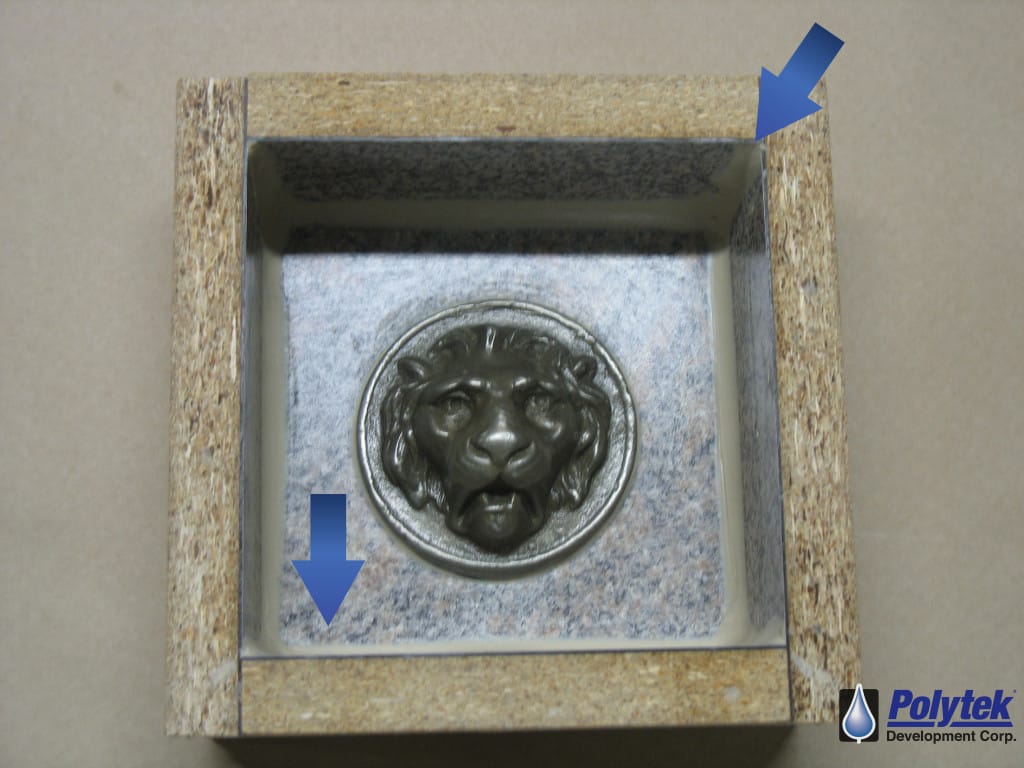
Figure 3: Plasticine clay was used to seal the edges of the mold box
Step Four: If Necessary, Apply Sealer and/or Release Agent
Sealing Porous Models
Generally, porous models need to be sealed before a release agent is applied and before rubber is poured. The sealing agent should be determined based on the model material and rubber mold material.
For many porous models, several coats of paste wax, petroleum jelly, shellac, paint, melted paraffin, lacquer, or PVA (polyvinyl alcohol) solution work well. Some rubbers contain ingredients that dissolve paint and lacquers; wax or shellac may work in this case. (Polyurethane rubbers will bond to shellac, so a release agent needs to be carefully applied in this case).
For bare plaster, lather potter’s soap or Murphy’s Oil Soap onto the damp surface with a soft brush. Rinse and repeat this process several times and then polish the surface with a soft cloth. Do not try this method on materials that are not plaster.
In this case, a sealing agent was not necessary.
Applying Release Agent
When working with silicone mold rubber, the model should be coated with Pol-Ease® 2500 Release Agent [Figure 4] before pouring. Platinum silicones rubbers, in particular, can sometimes suffer from cure inhibition when poured on some surfaces (cure inhibition is the failure to cure against a surface within the recommended time – the surface in contact with the pattern remains gummy or uncured). Test cures are highly recommended before covering the entire model with rubber.
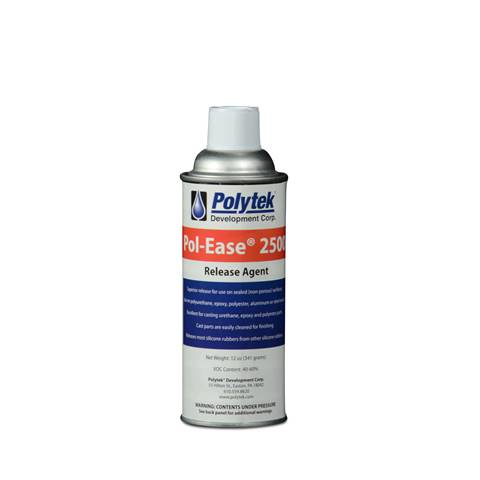
Figure 4: Pol-Ease® 2500 Release Agent is used with silicone mold rubbers.
Before pouring polyurethane mold rubber, the model should be coated thoroughly with Pol-Ease® 2300 Release Agent [Figure 5].
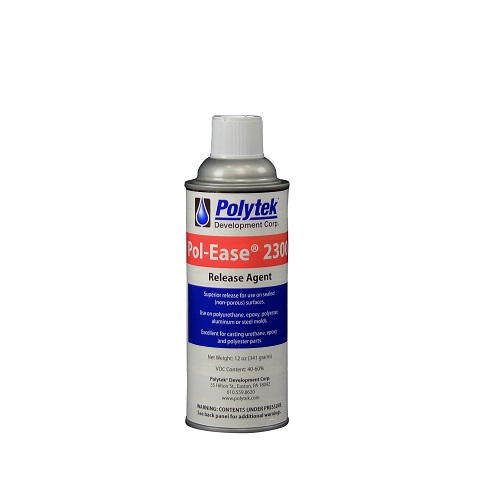
Figure 5: Pol-Ease® 2300 Release Agent, a silicone-based option, is used with polyurethane mold rubbers
Release agents should be sprayed evenly over the entire surface (including mold box base board and mold box walls), then brushed with a dry brush to ensure an even coat.
Step Five: Determine How Much Liquid Rubber Is Needed
How to Calculate:
For a Box
- Calculate the volume of the mold box (L x W x H= Volume) [Figure 6].
- Estimate the volume of the model.
- Subtract the estimated volume of the model from the volume of the mold box.
- Divide the result (the volume of the mold area) by the specific volume of the mold rubber. (For this mold, we are using PlatSil® 73-40. The specific volume of this rubber is 22.0 in3/lb).
The resulting number is the amount (lb) of liquid rubber needed.
For a Cylinder
Follow the same process as above. You can find the volume of the cylinder by performing this calculation: π x R 2 x H [Figure 6].
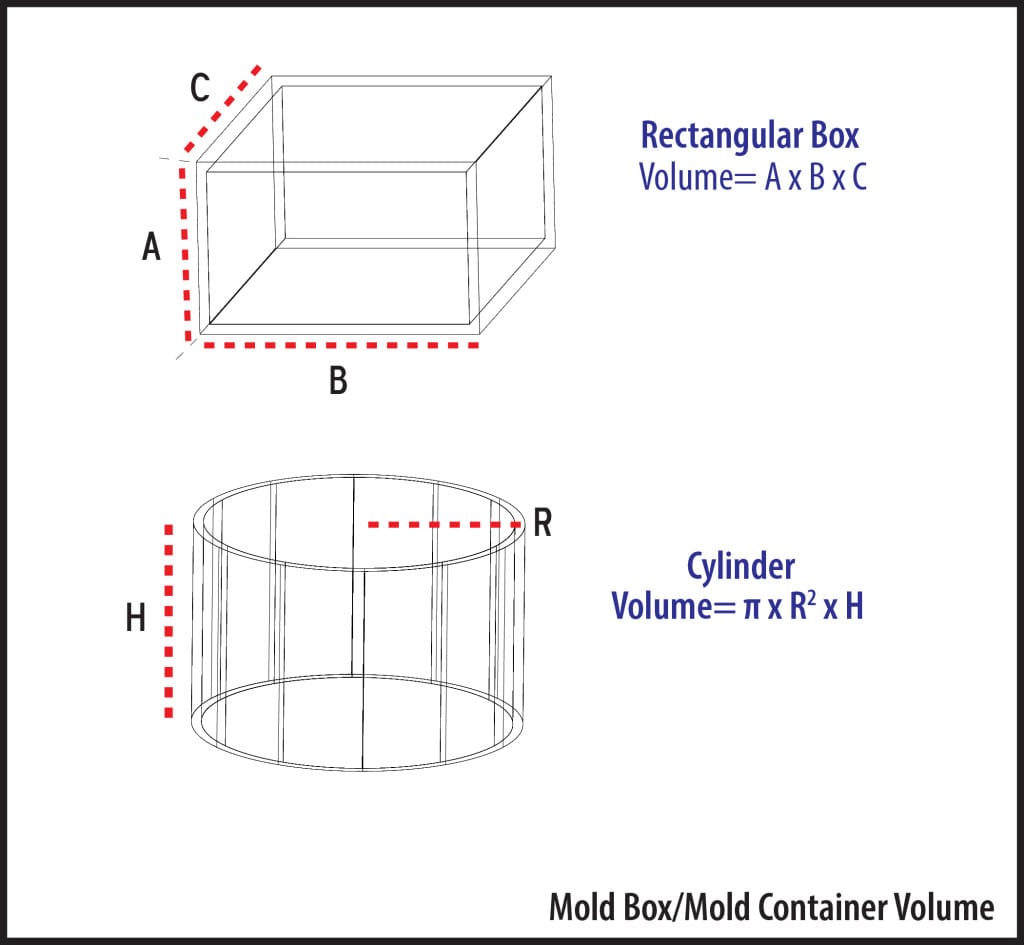
Figure 6: How to calculate the volume of a rectangular box or cylinder
Step Six: Weigh & Mix Rubber
Once the amount of rubber necessary for the project is determined, weigh and mix the rubber. All Polytek polyurethane and silicone rubbers are two-part systems (Part A & Part B). In this case, the mix ratio for PlatSil® 73-40 is 1A:10B by weight. Many of our products are 1A:1B.
Before mixing, rubber should be at room temperature and all tools should be ready (some “working times”, the time you have before the rubber begins to cure, can be very short – if tools are not ready, the product may cure before entirely poured). The working time for PlatSil® 73-40 is 45 minutes.
In some cases, Part B must be shaken or stirred before mixing with Part A.
Great care must be taken to ensure proper mix ratio. We recommend measuring all rubbers (that are not 1A:1B) by weight on a digital scale; not by volume.
Mix Parts A and B together thoroughly [Figure 7].
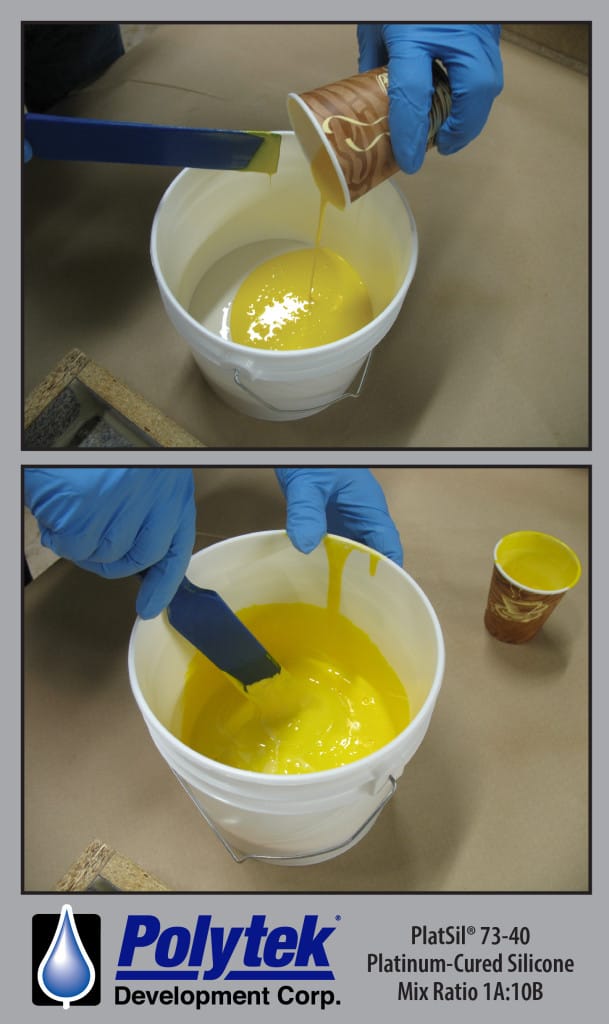
Figure 7: Mix Parts A & B together thoroughly
Before pouring the mixed rubber into the mold box, some may choose to utilize a vacuum chamber or pressure pot to remove air bubbles from the mixture. This is not always necessary and should be determined on a case-by-case basis.
Step Seven: Pour Rubber
Make sure the mold box is level before pouring the rubber. Uneven molds will eventually lead to uneven castings.
Start by pouring rubber into one corner of the mold box. Pour rubber into rubber, allowing rubber to flow across the model. Avoid pouring directly onto the model [Figure 8]. This helps to prevent trapped air bubbles.
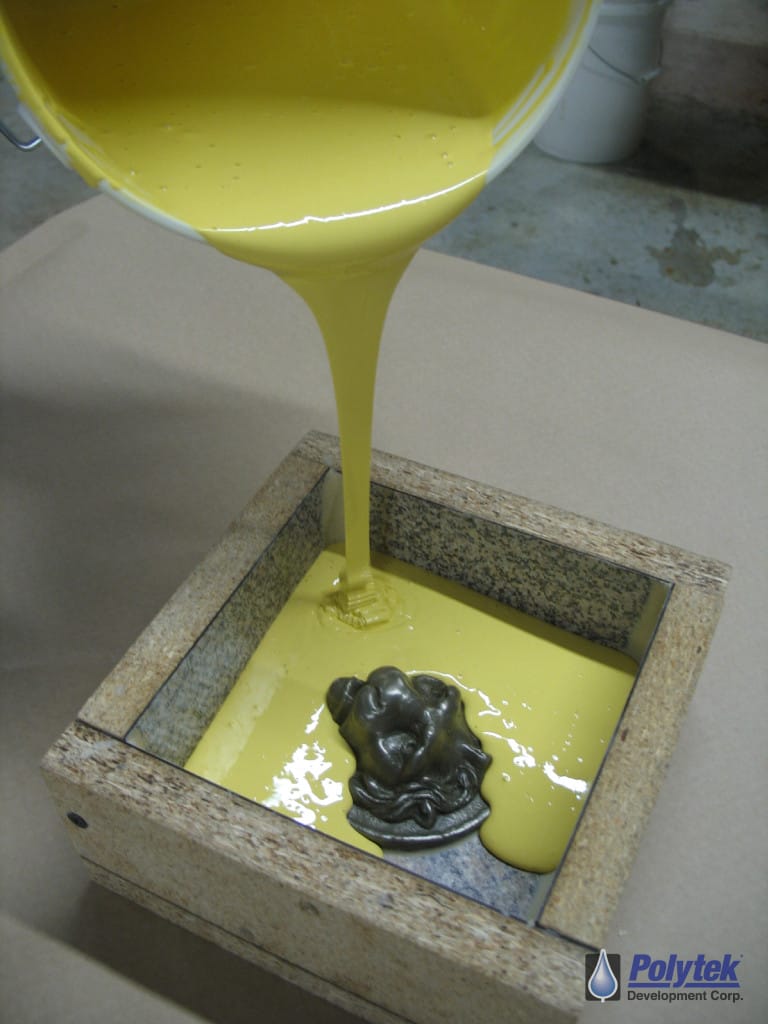
Figure 8: Pour rubber into rubber, allowing it to flow across the model
Ensure that the rubber meets an appropriate height level and that all parts of the model are sufficiently covered.
Spraying the appropriate release agent onto the surface of the rubber right after pouring helps to release surface air bubbles.
Step Eight: Allow Rubber to Cure
Cure time varies from rubber to rubber. Some rubbers can be demolded in 30 minutes, while others should not be removed from their mold boxes for at least 24 hours. Cure time will decrease with higher temperatures.
Demolding too soon can cause deformities in the rubber.
PlatSil® 73-40 has a cure time of 16 hours at room temperature (~77°F).
Step Nine: Demold
Once the rubber has cured, carefully demold. The mold box walls may need to be removed in order to remove the mold.
The mold is now complete [Figure 9] and the casting process can begin [Figure 10 & 11]!
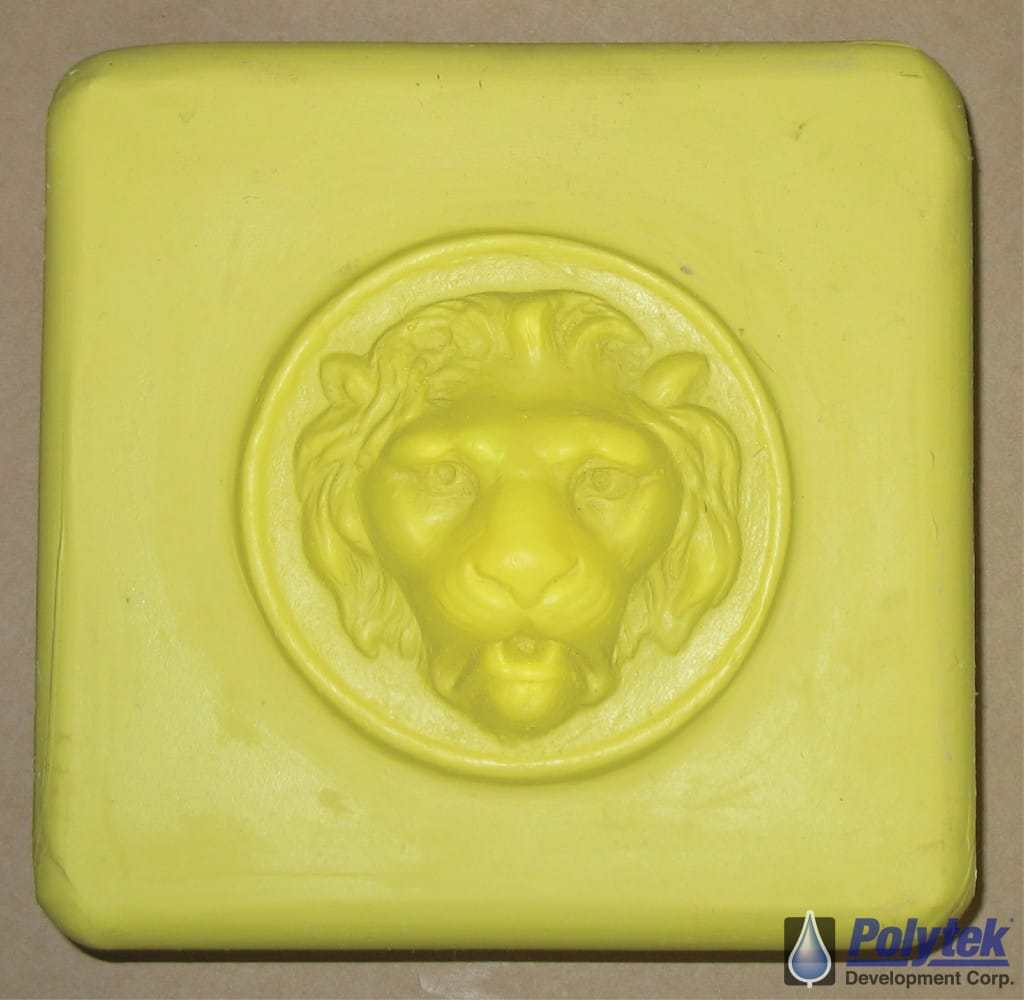
Figure 9: The completed one-piece Platsil® 73-40 block mold
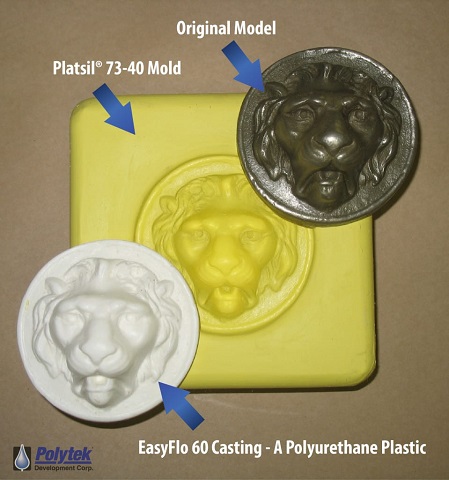
Figure 10: A plastic casting (EasyFlo 60) from the mold
We got a little carried away with our PolyColor dyes:
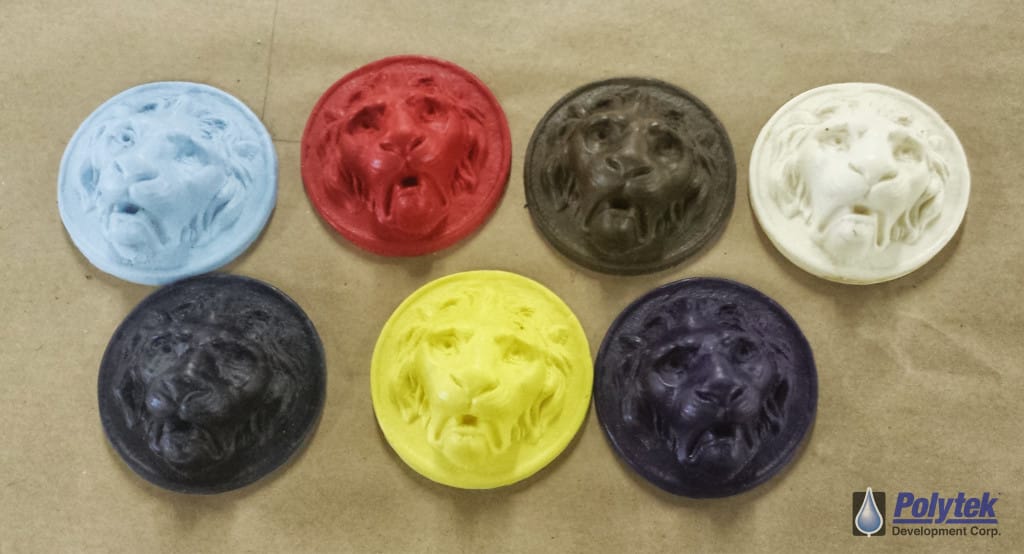
Figure 11: Several castings from the mold (using EasyFlo 60 & PolyColor dyes)