Creating Permanent Masters for Mold Making
This article focuses on how to make hard rubber or plastic copies of original masters. There are a number of good reasons to create “permanent masters” of originals:
- Some original masters (e.g., stone) can easily break or crumble.
- Using original masters multiple times requires re-application of sealing agents, release agents and caulking.
- If you produce molds in large volume, multiple identical masters allow for production of multiple molds simultaneously.
How to Make Copies of an Original Master
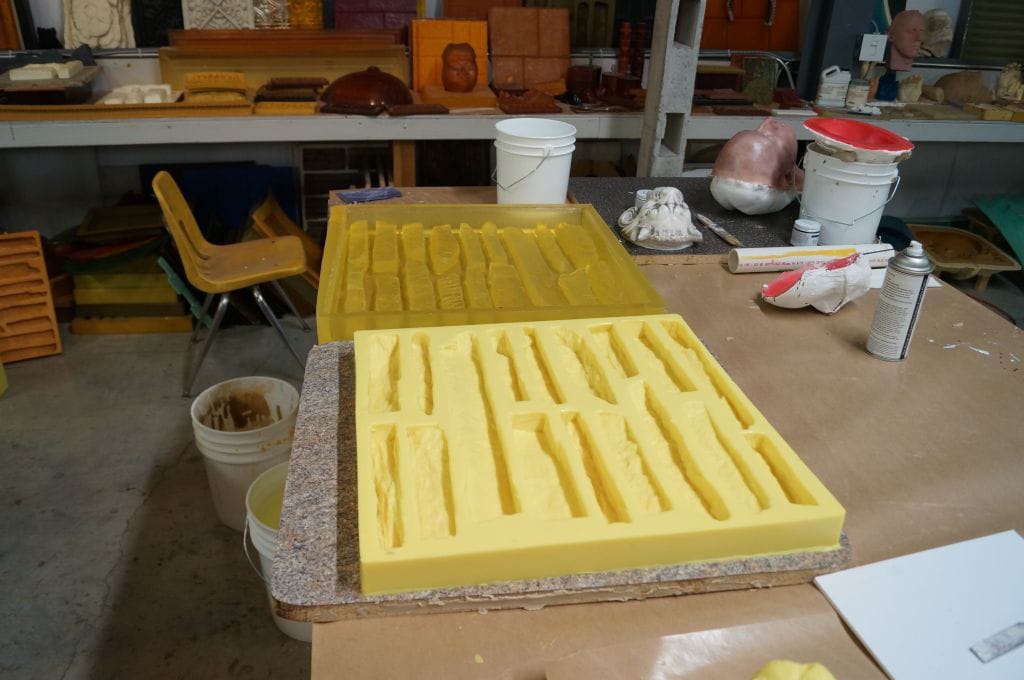
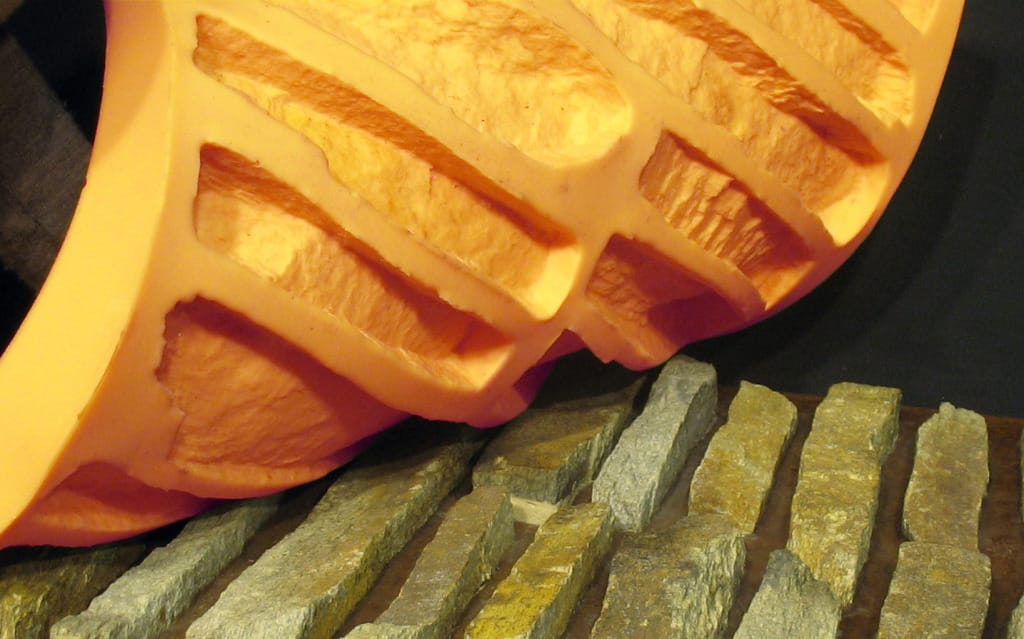
In this example, we’ll focus on a veneer stone master, which is composed of multiple side-by-side stones affixed to a baseboard. This master is designed to create a multi-cavity mold.

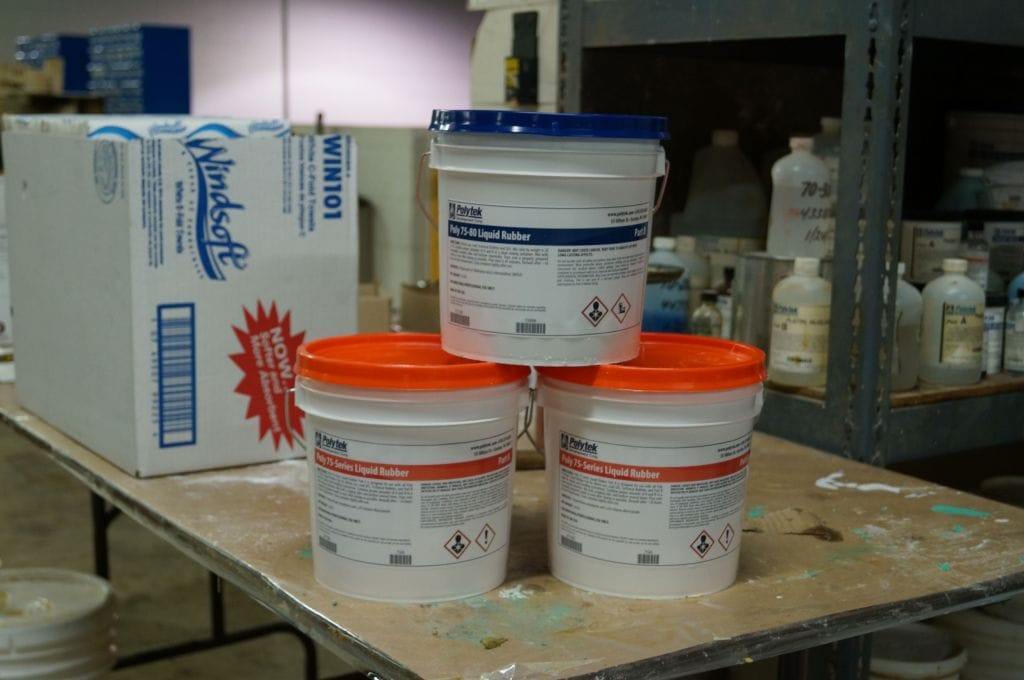
To create a duplicate master of these veneer stones, we choose to use a hard polyurethane rubber:
Poly 75-80
Liquid Rubber.
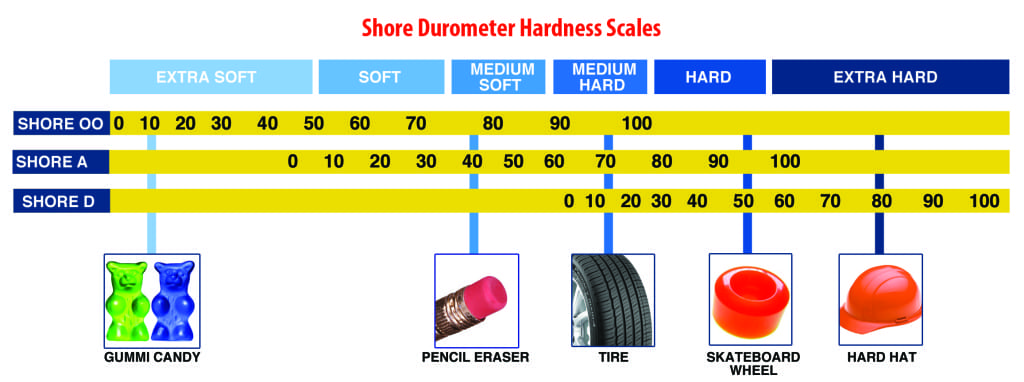
On the Shore Hardness Scale, Poly 75-80 falls on the A scale at 80. It is a hard material, but will not break if it
falls from a shelf, for instance.
Polyurethane plastics in the Poly 15-Series are also very popular
for this use.
Step 1: Prepare the Existing Mold
The mold pictured below is made from Poly 74-20 liquid rubber. It was poured over the veneer stone master pictured above and was made several years ago (for a tutorial on how to make a veneer stone mold, visit our YouTube Channel).
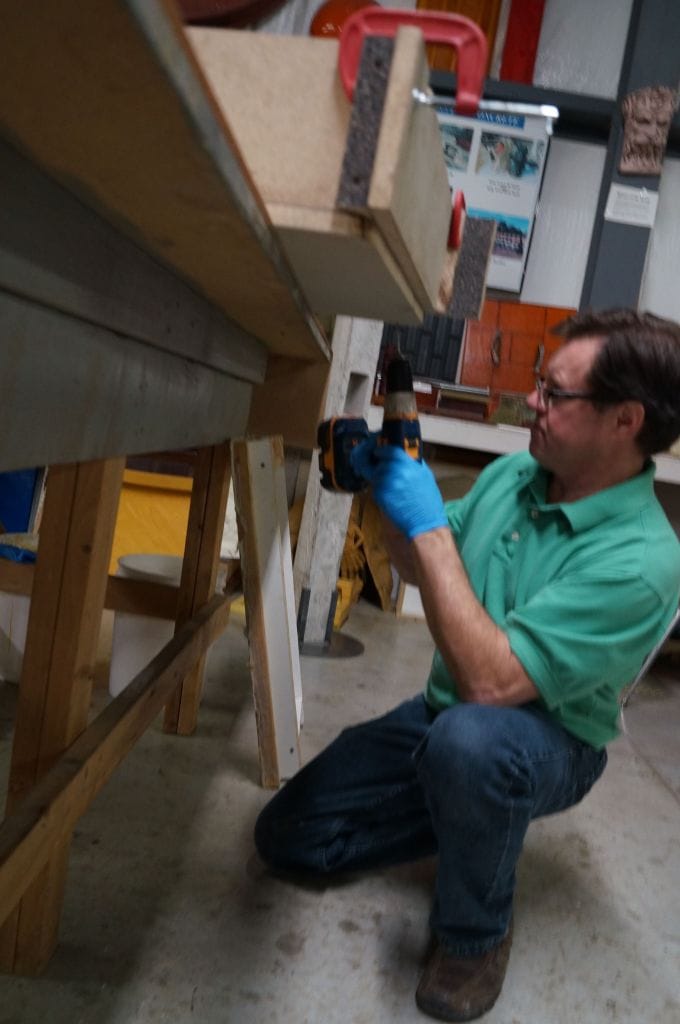
Place the mold on a baseboard. We use melamine-laminated particle board for this tutorial.

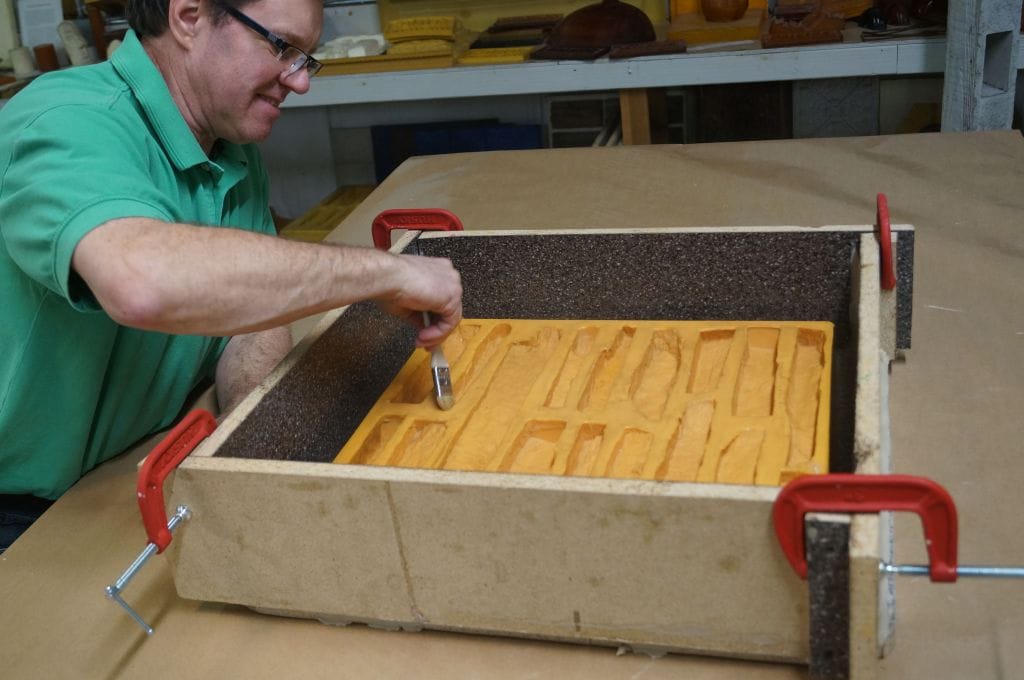
To prepare the mold, first start by cleaning it off so there is no dust or debris that comes out with the master copy. Denatured alcohol is a good cleaning solvent, but care should be taken due to its flammability. Apply denatured alcohol to a rag or towel and wipe the mold.
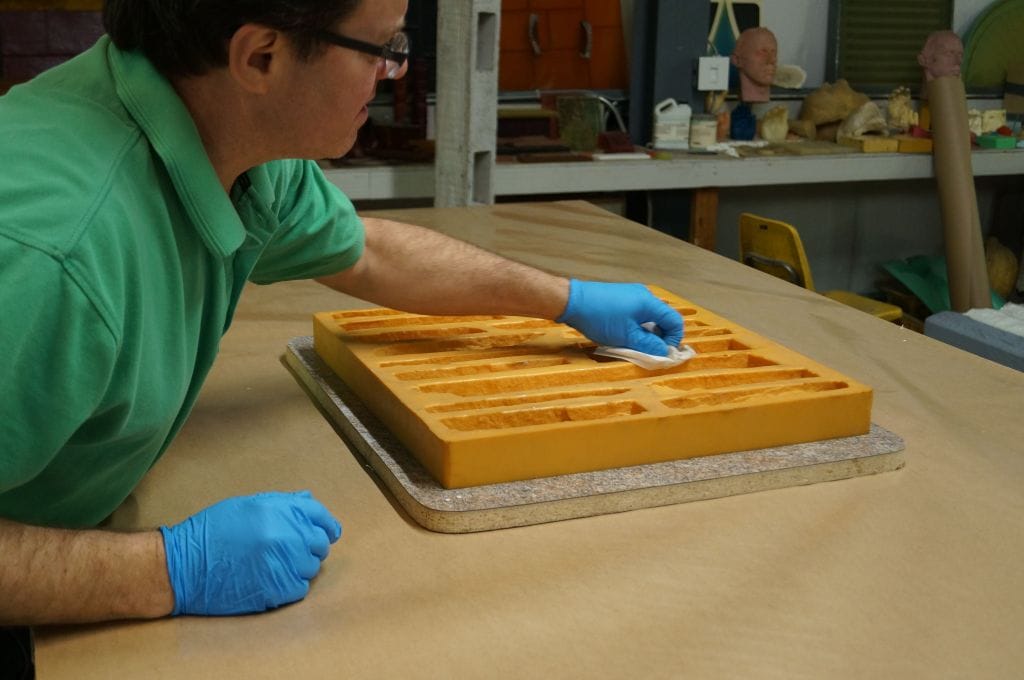
Seal the edges of the mold so that casting rubber does not run beneath it. Typically, we seal edges with warmed plasticine clay; however, this particular mold has been exposed to quite a bit of release agent over the years and the clay has difficulty sticking directly the rubber.
We apply hot glue to the edges and smooth it out with a tongue depressor.
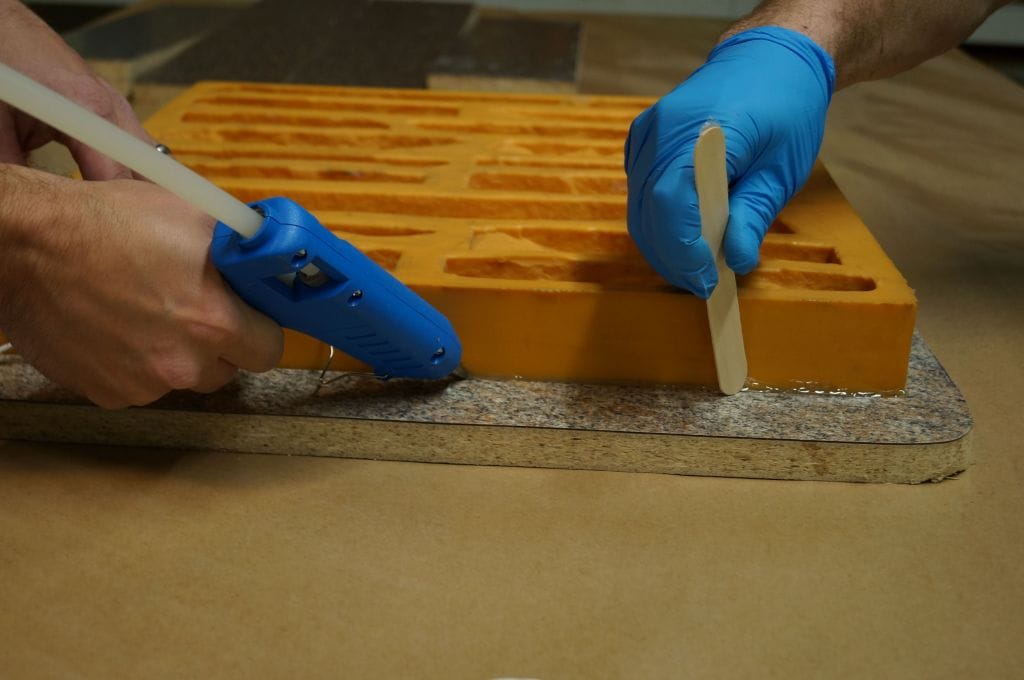
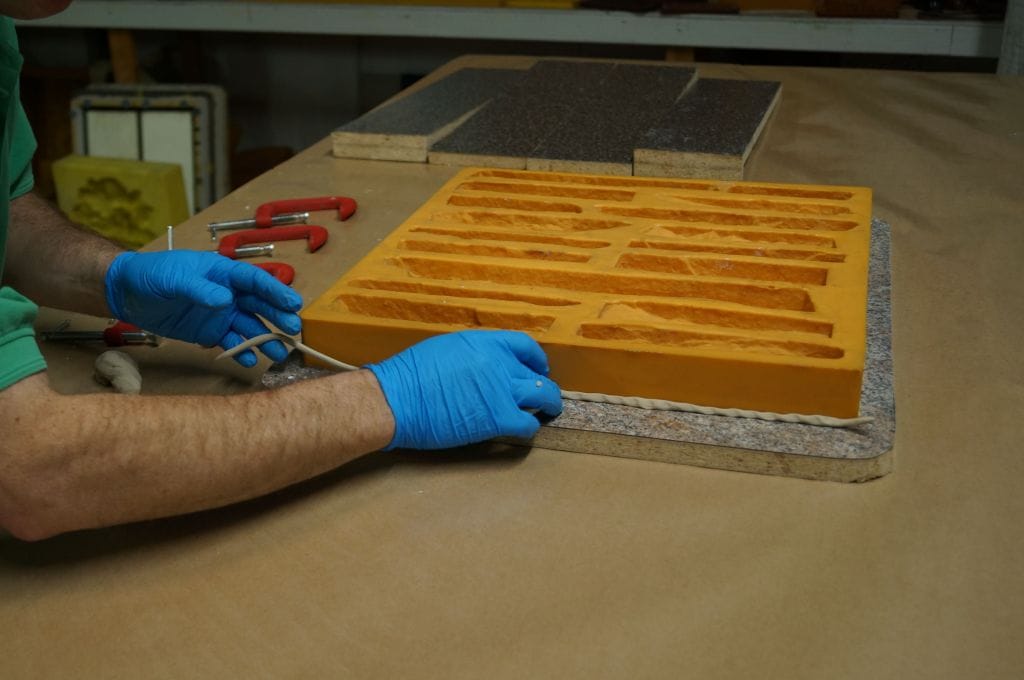
Then we apply warmed plasticine clay over the glue and smooth it out.
Step 2: Construct Mold Box
Construct a mold box to contain the casting material that will be poured into and over the existing mold.
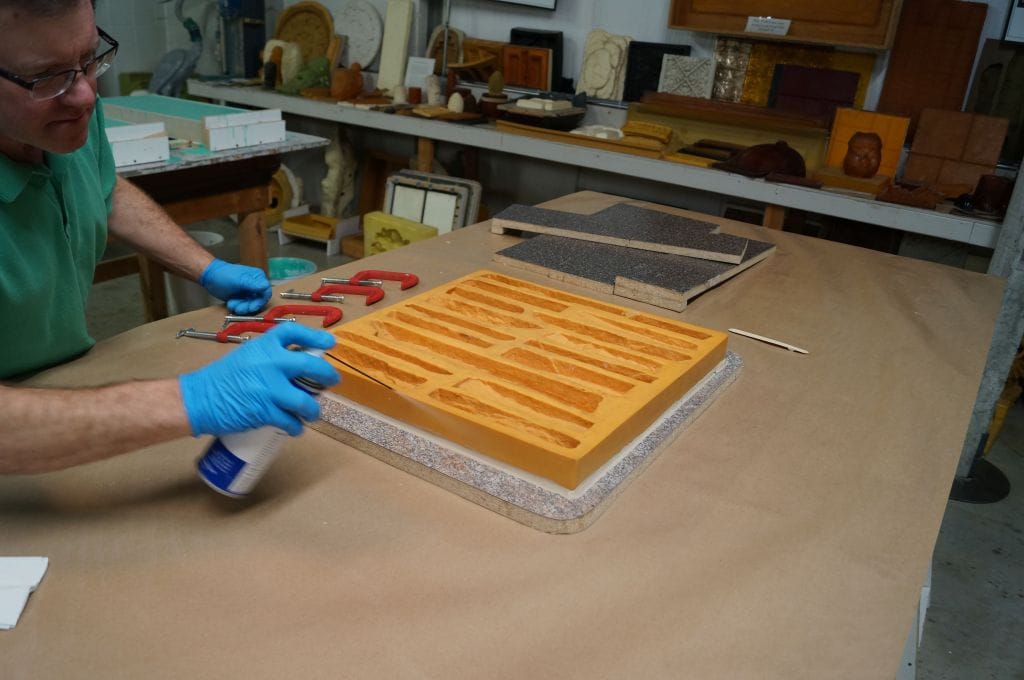
Prior to constructing mold box walls, spray release agent onto the exposed baseboard and brush it out with a dry brush (it will be more difficult to reach once the walls are constructed). The casting material is a polyurethane rubber, so Pol-Ease® 2300 Release Agent is used.
Assemble mold box walls and secure them. We use melamine-laminated particle board for the walls and secure them together with C-Clamps.
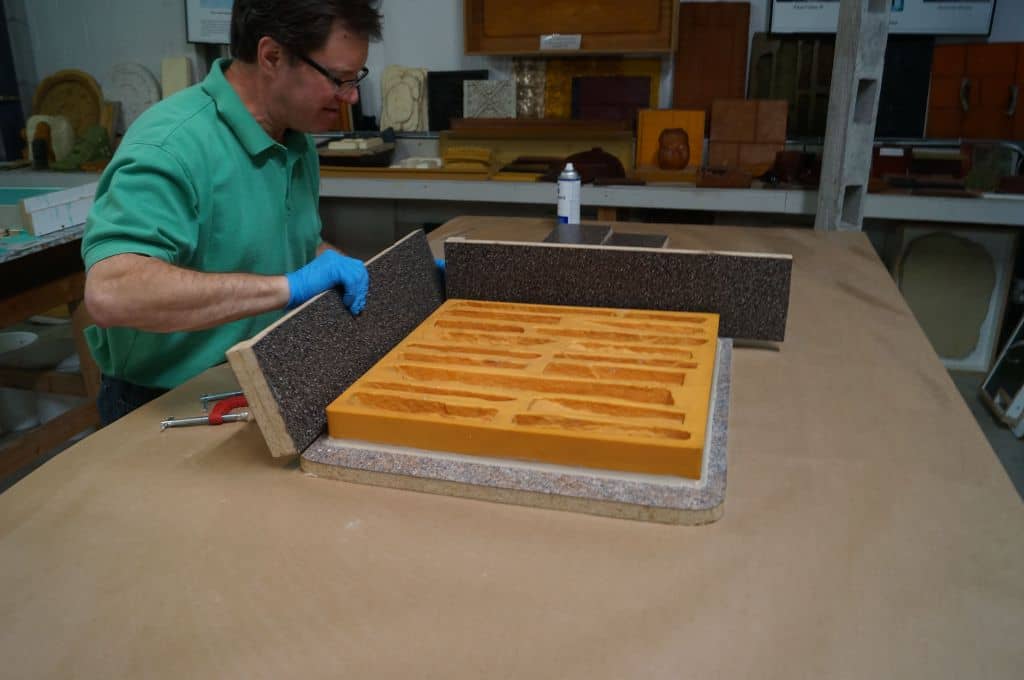
In this case, the finished duplicate master will have built-in walls, so the mold box is lined up 1/2″ beyond the exterior walls of the existing mold. The great benefit of having built-in walls is that there is no need to create a containment area around the permanent master every time a mold is made.
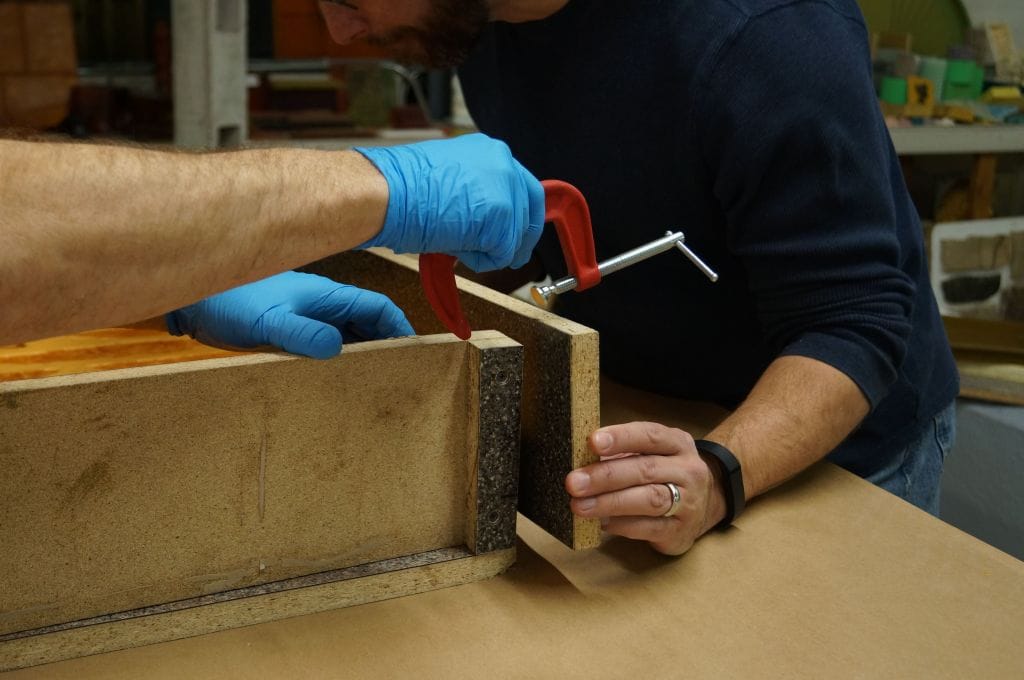
To prevent the mold box walls from lifting or “floating” when the rubber is poured, we secure them to the baseboard with screws.
Seal the exterior edges of the mold box with clay so rubber does not seep out (hot glue or caulking also work).
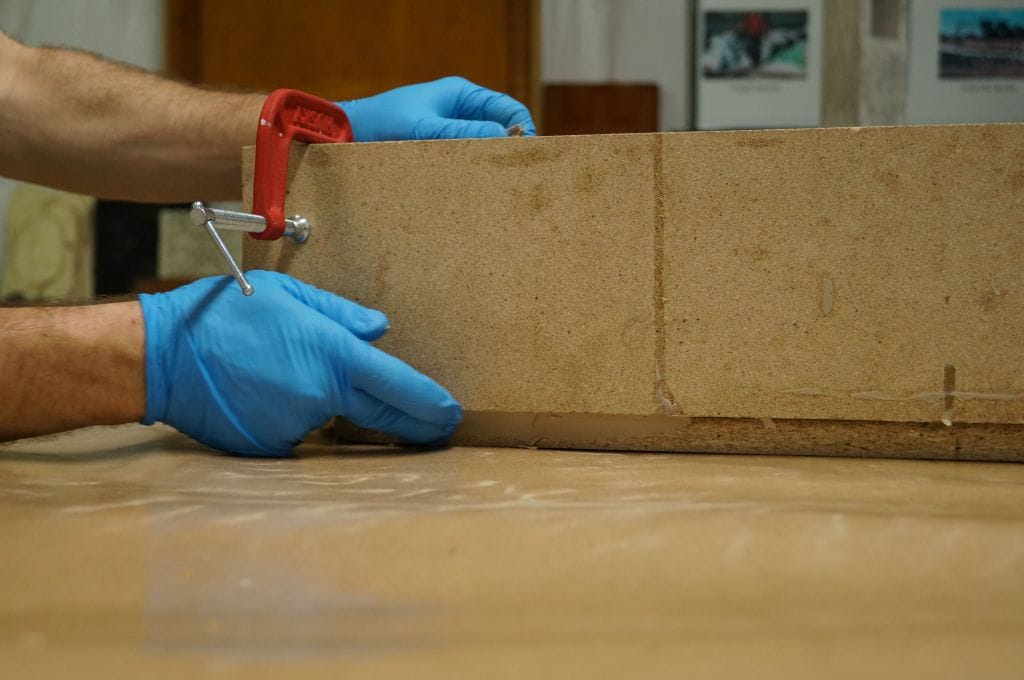
Also seal the interior corners of the mold box.
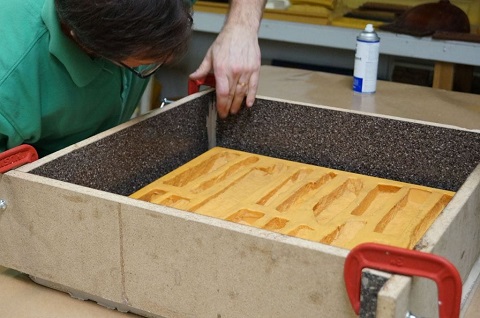
Step 3: Apply Release Agent to the Existing Mold
Very thoroughly coat the existing polyurethane mold with Pol-Ease 2300 Release Agent. Liquid polyurethane rubber will adhere readily to cured polyurethane rubber, so it is imperative to thoroughly cover the mold.
Brush out the release agent with a dry brush to promote even coverage.
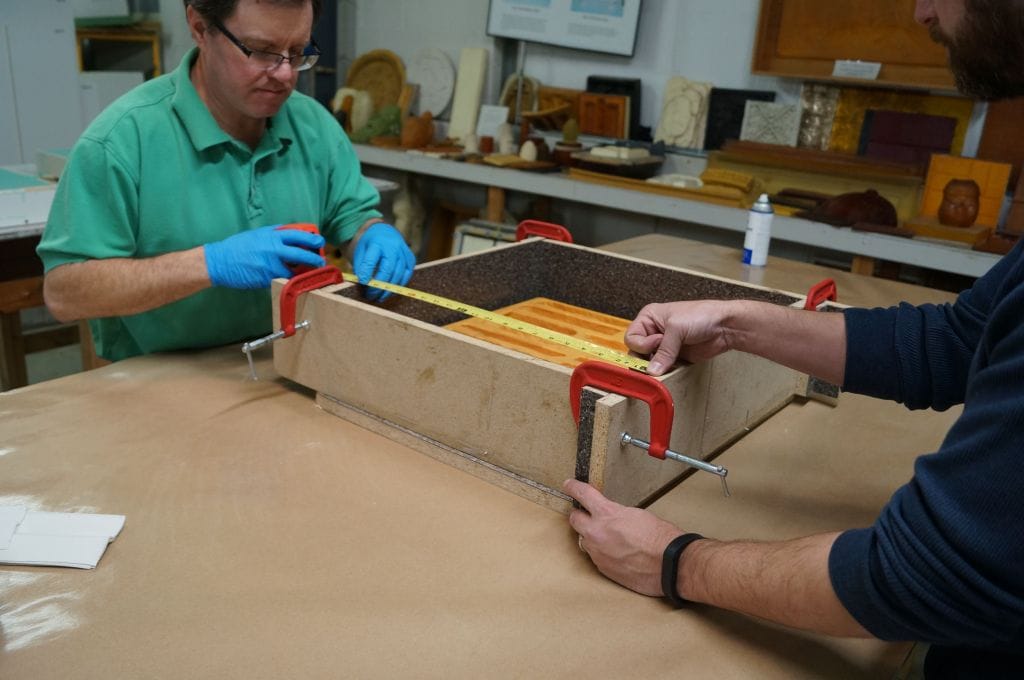
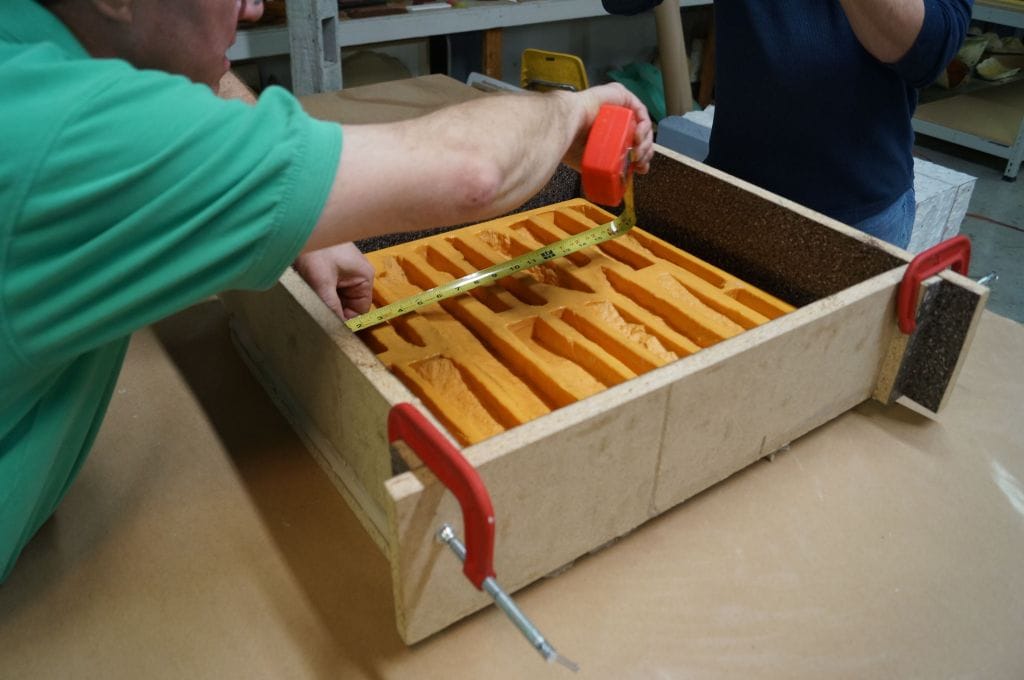
Step 4: Calculate Amount of Casting Material Needed
To calculate the amount of casting material needed to make the duplicate master, use the following calculation:
- Determine the volume of the mold box (L” x W” x H”). In this calculation, incorporate at least 1/2″ of space above the top of the existing mold.
- Subtract the volume of the existing mold from the volume of the mold box.
- Take the result of that calculation and divide by the specific volume of the casting material (the specific volume of Poly 75-80 is 26 in³/lb). This final result is the amount of rubber (lb) needed to complete the duplicate master.
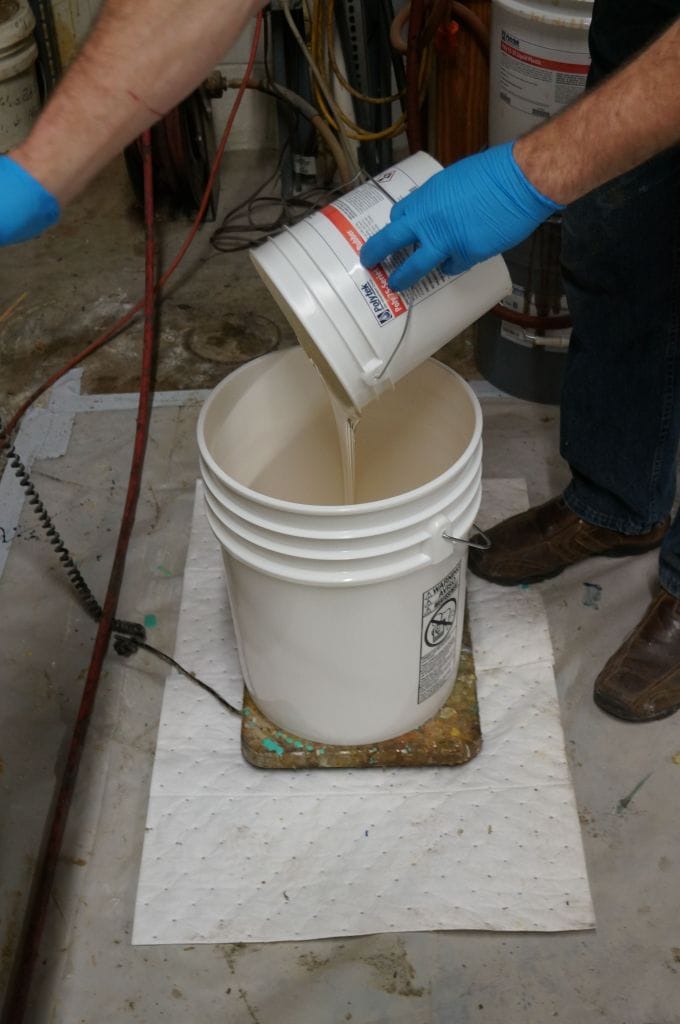
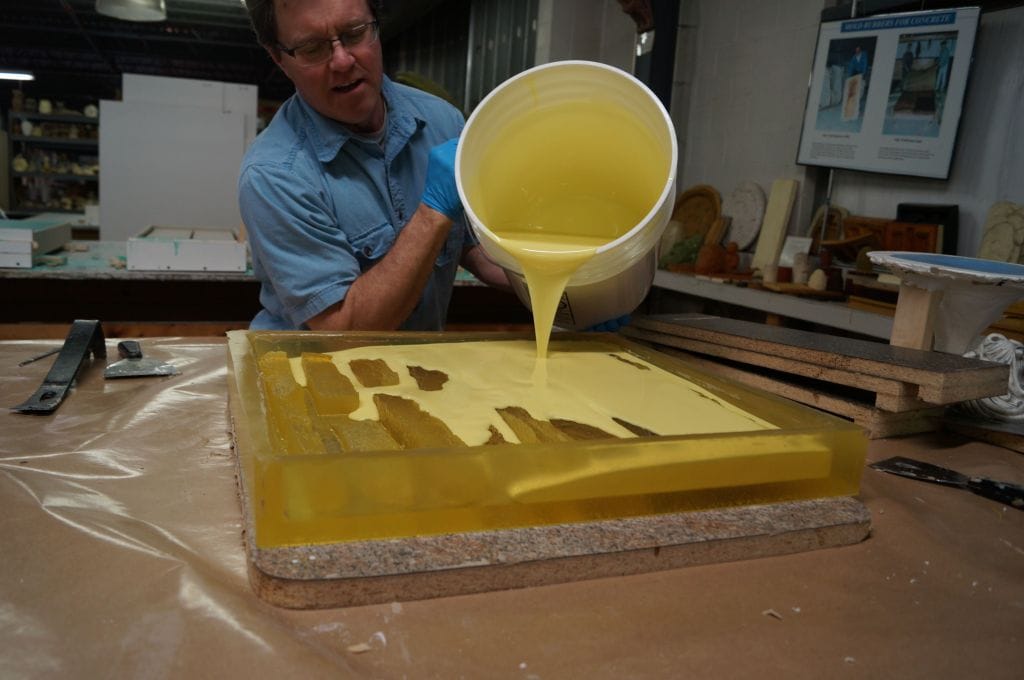
Step 5: Measure, Mix & Pour Liquid Rubber
Poly 75-80 Liquid Rubber has a mix ratio of 2A:1B, a pour time of 45 minutes, and a demold time of 16 hours.
Measure out Part B on a digital scale (we pour Part B into the mixing container first because it is lower in viscosity and is less likely to cling to the sides of the mixing container).
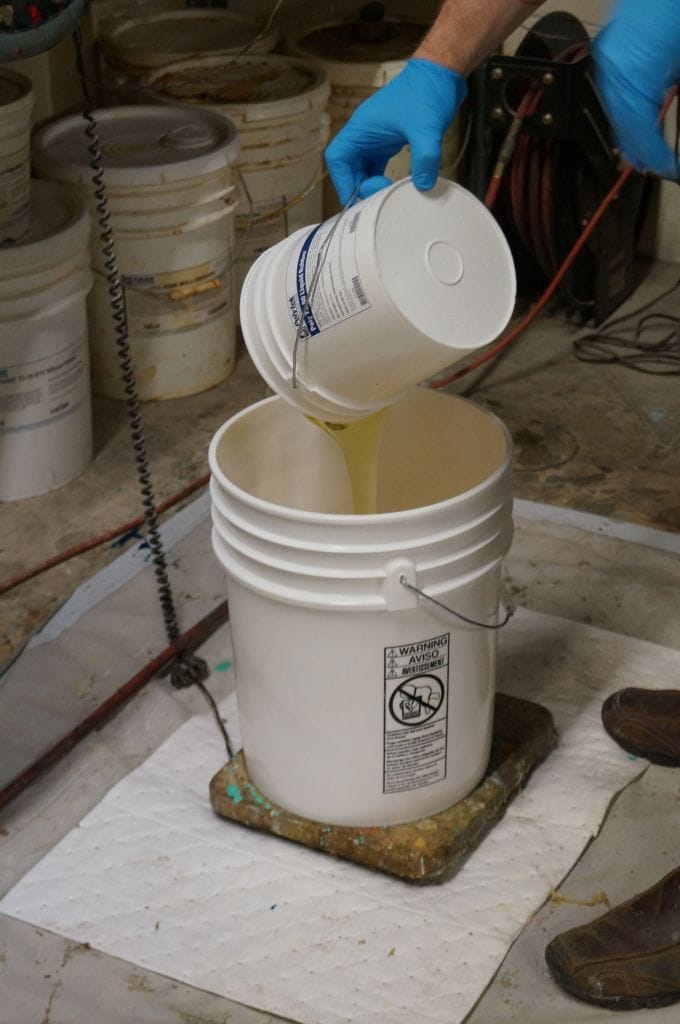
Measure out Part A on the scale.
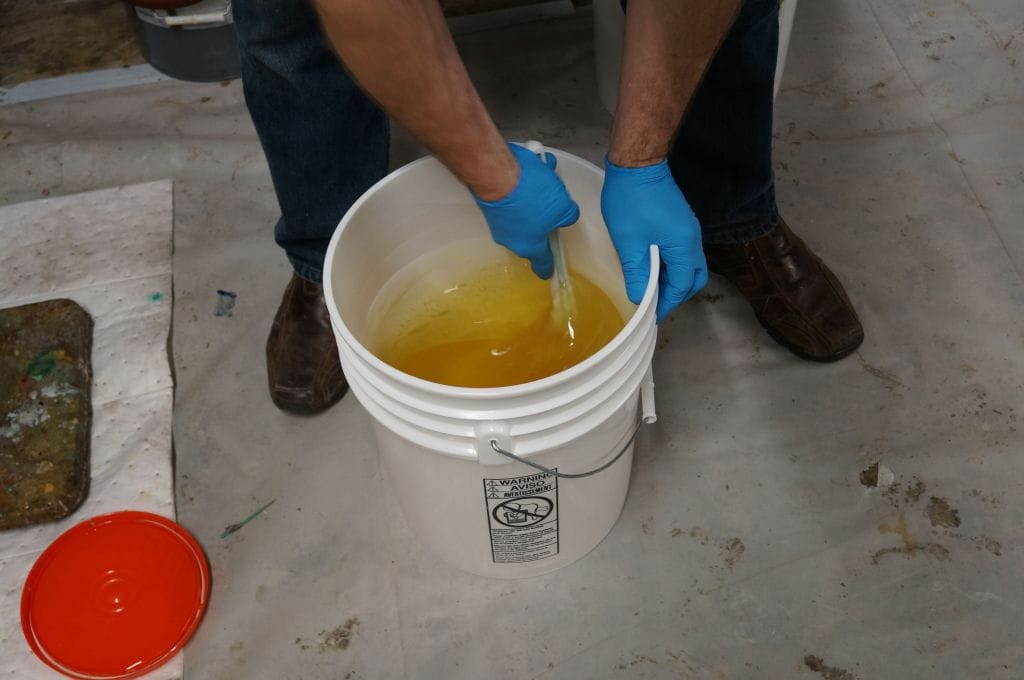
Thoroughly mix the rubber, scraping the sides and bottom of the mixing container several times. Mixing in a “figure 8″ pattern is also a good technique. We use a Poly Paddle to mix the rubber.
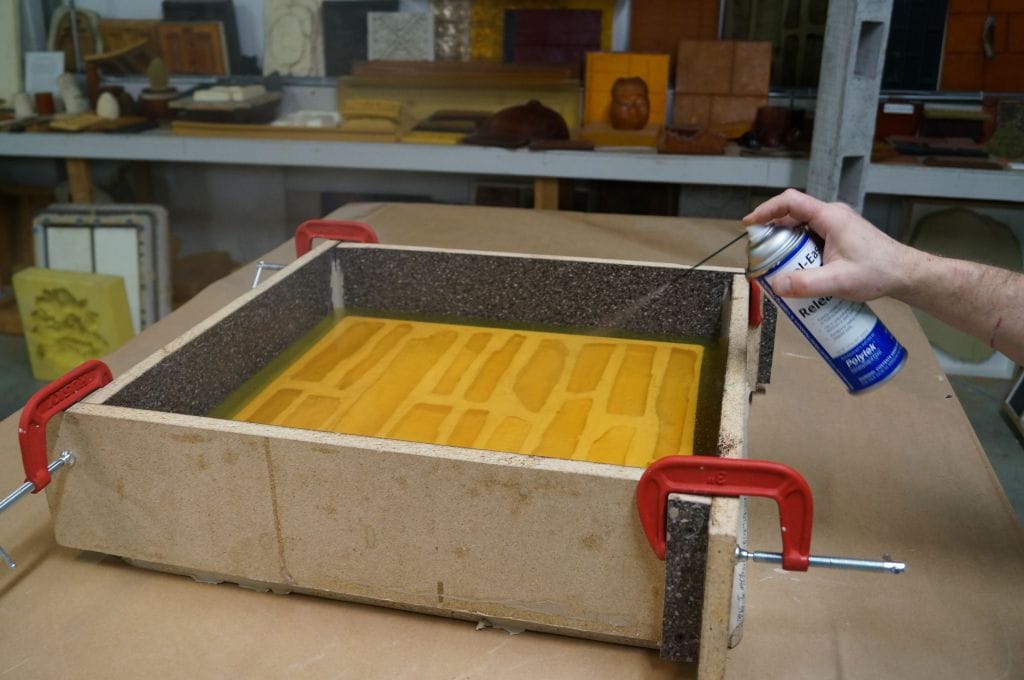
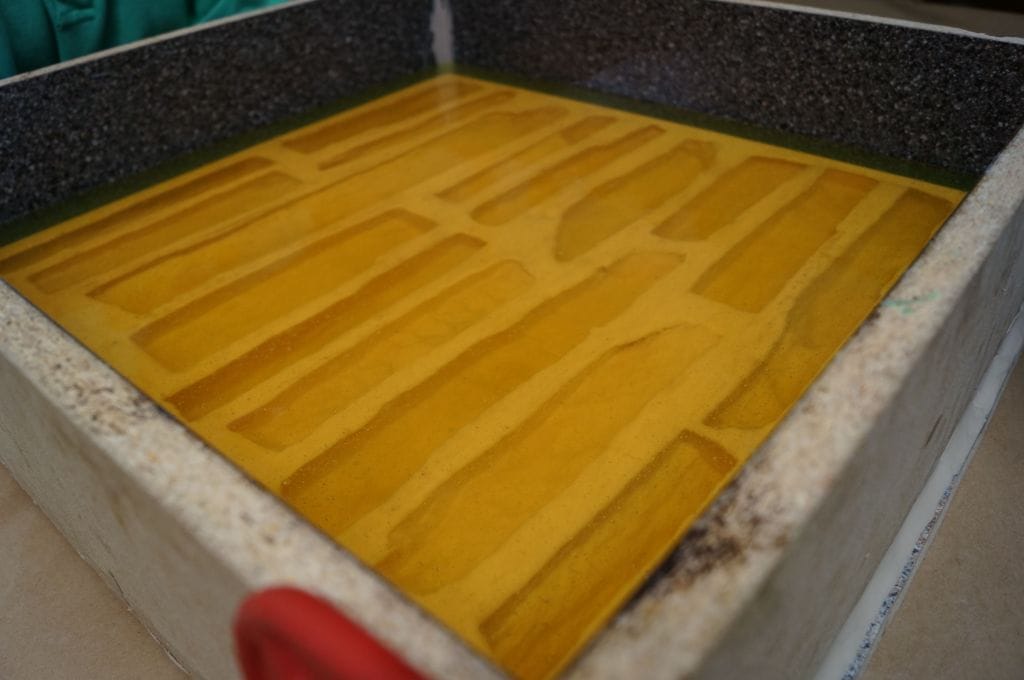
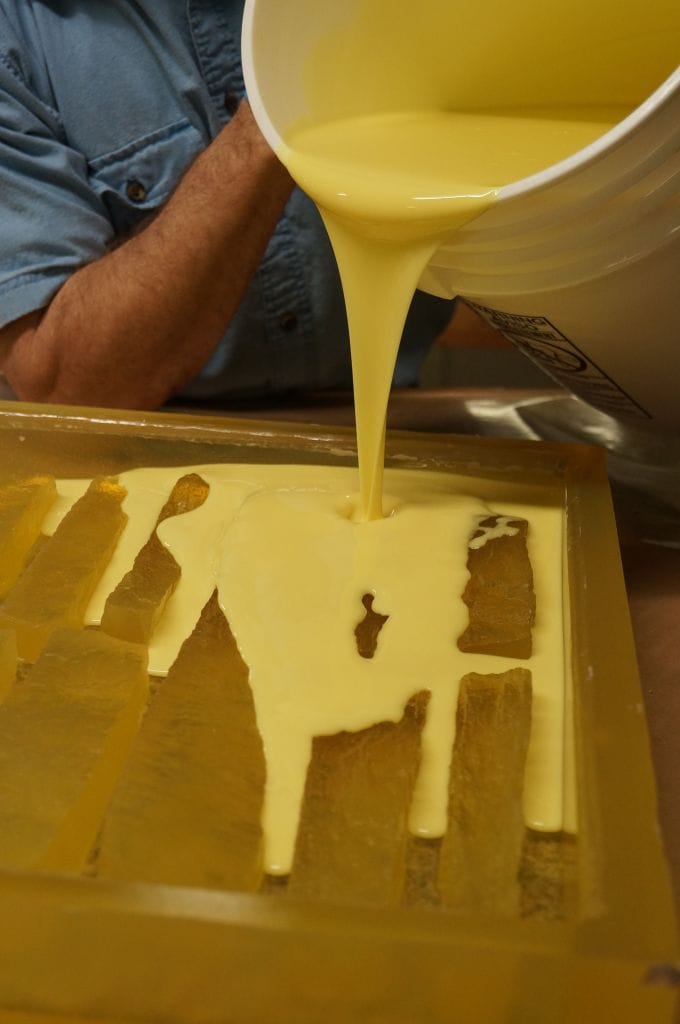
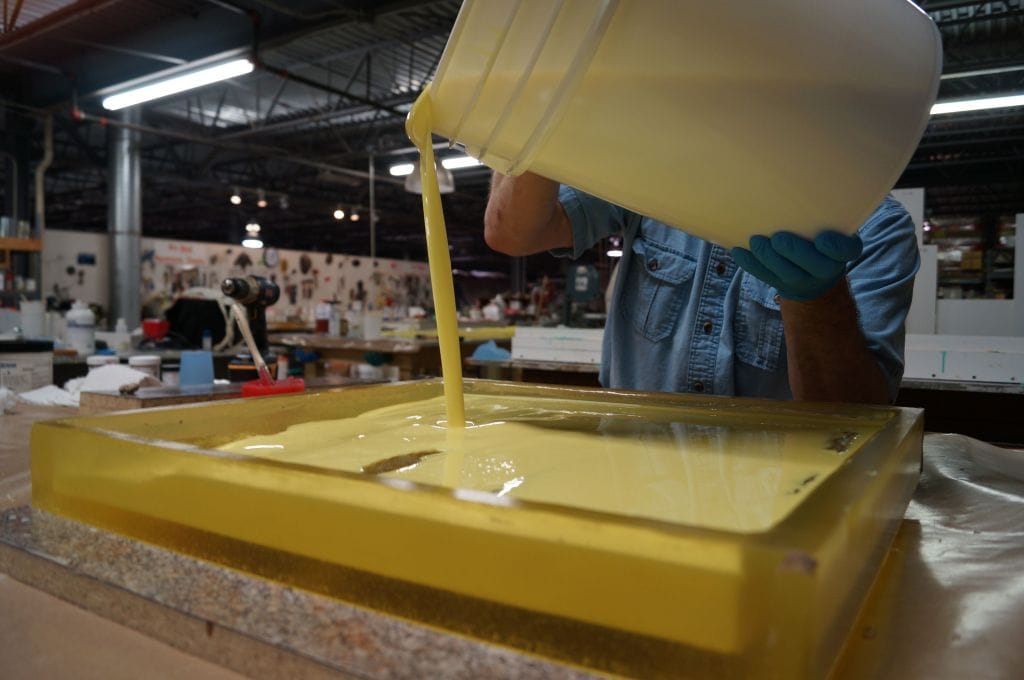
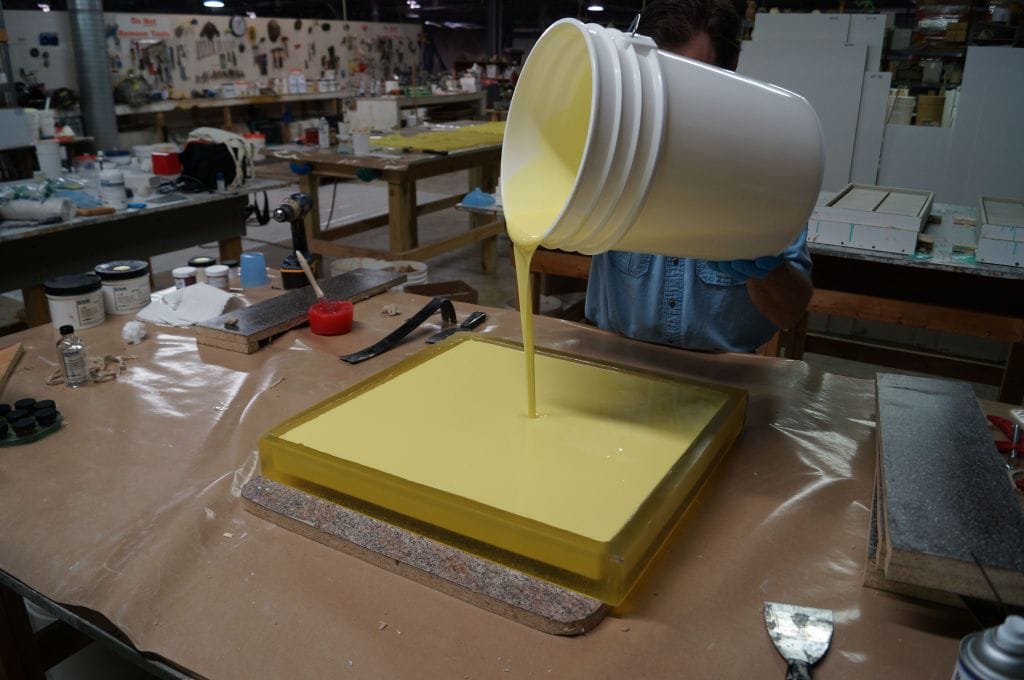
When thoroughly mixed, pour the rubber into one corner of the mold box and allow it to rise.
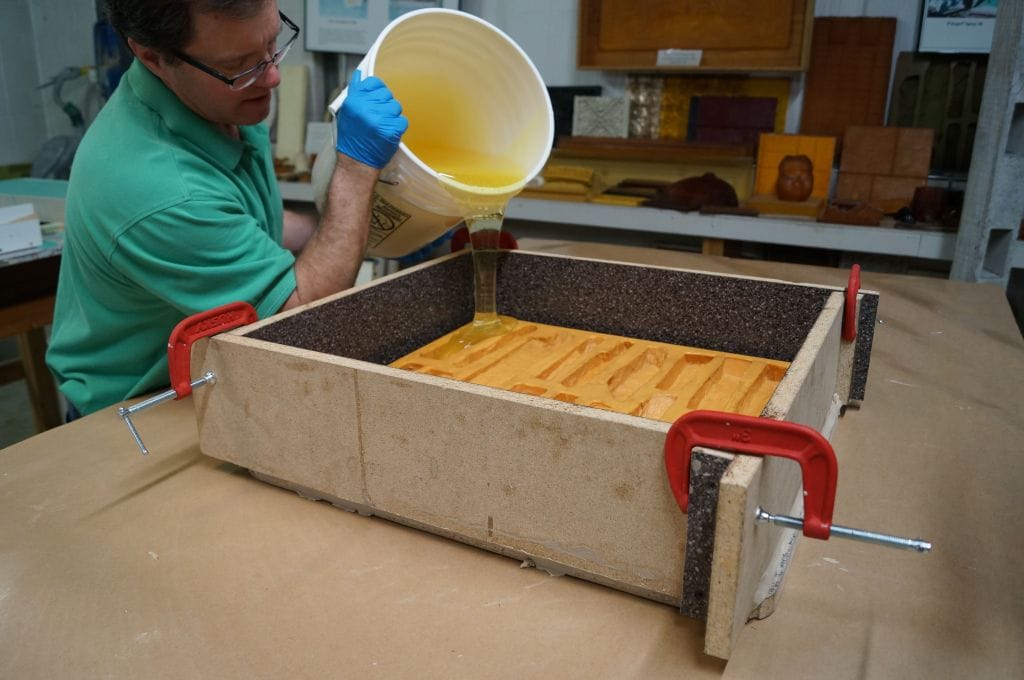
Pour rubber into rubber; avoid pouring directly onto the mold.
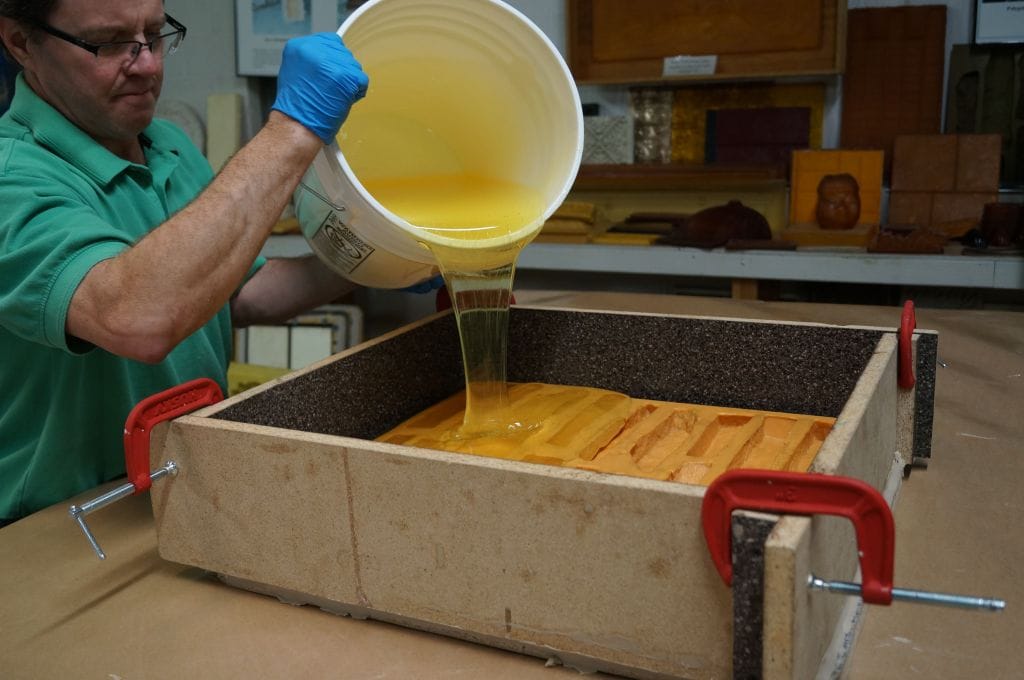
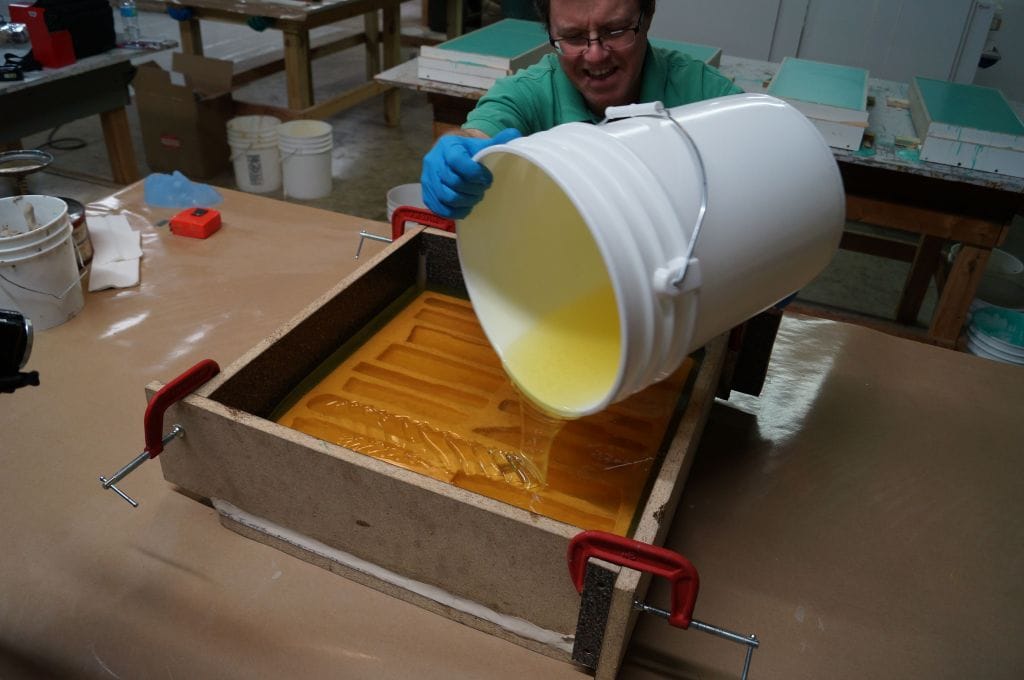
The rubber should be at least 1/2″ over the top of the mold.

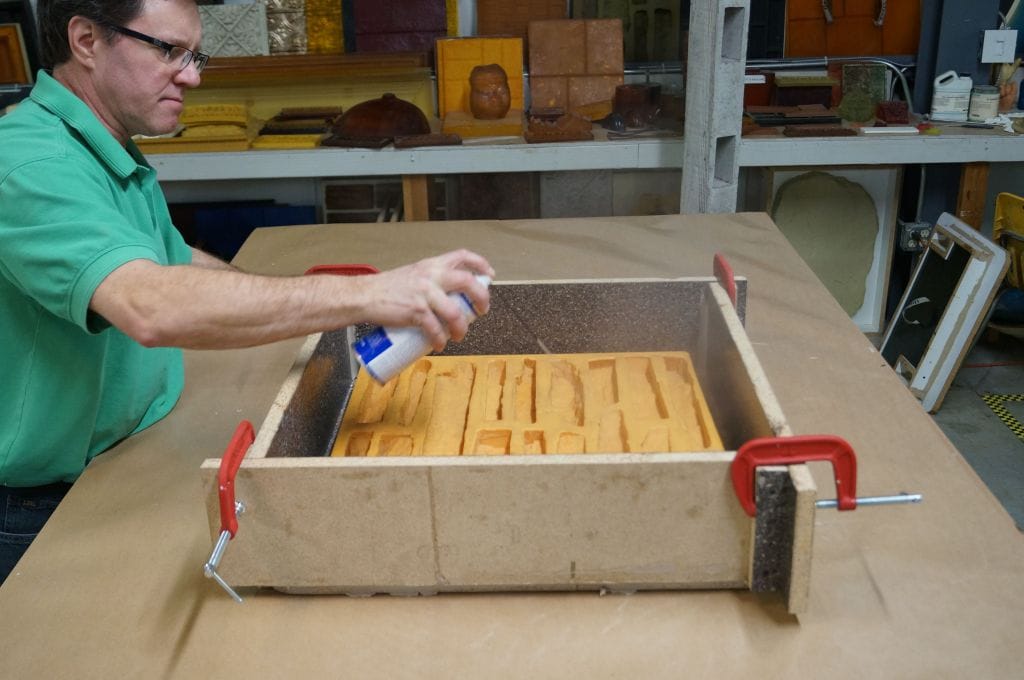
To help eliminate surface air bubbles, spray Pol-Ease 2300 Release Agent across the surface of the rubber immediately after pouring.
Allow the rubber to cure for 16 hours before demolding. Final cure properties are reached in about 7 days; however, molds can be used, with care, after curing for 24-48 hours.
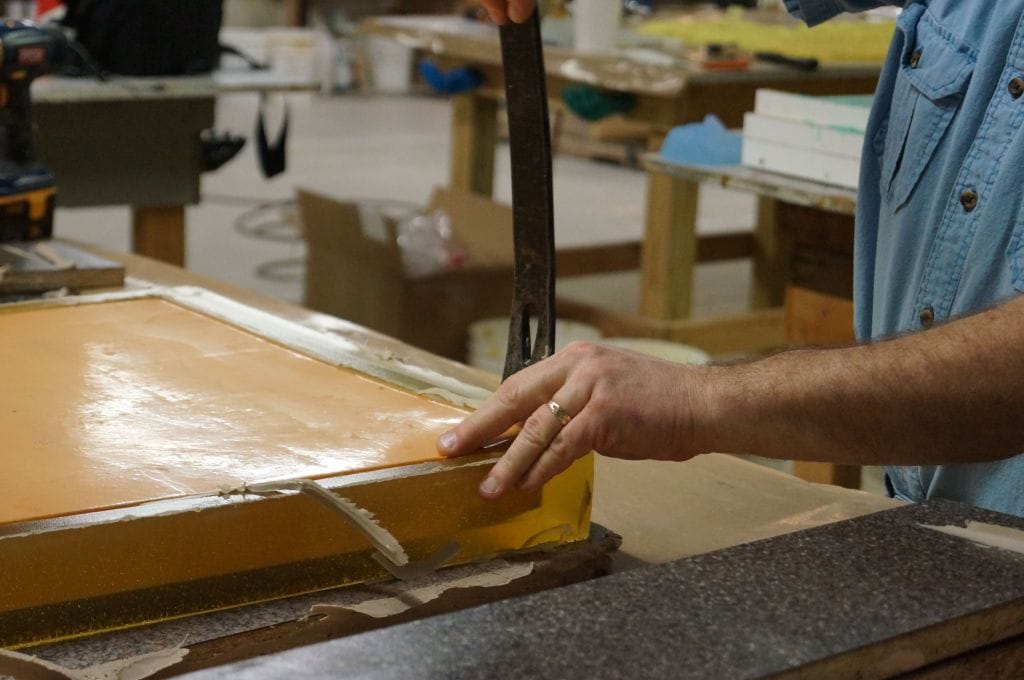
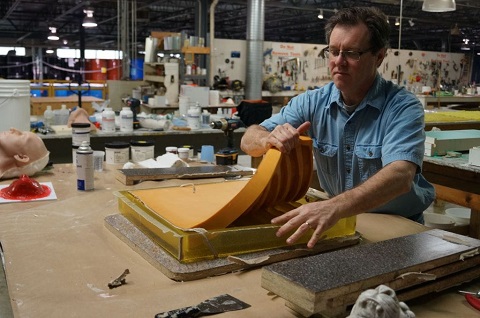
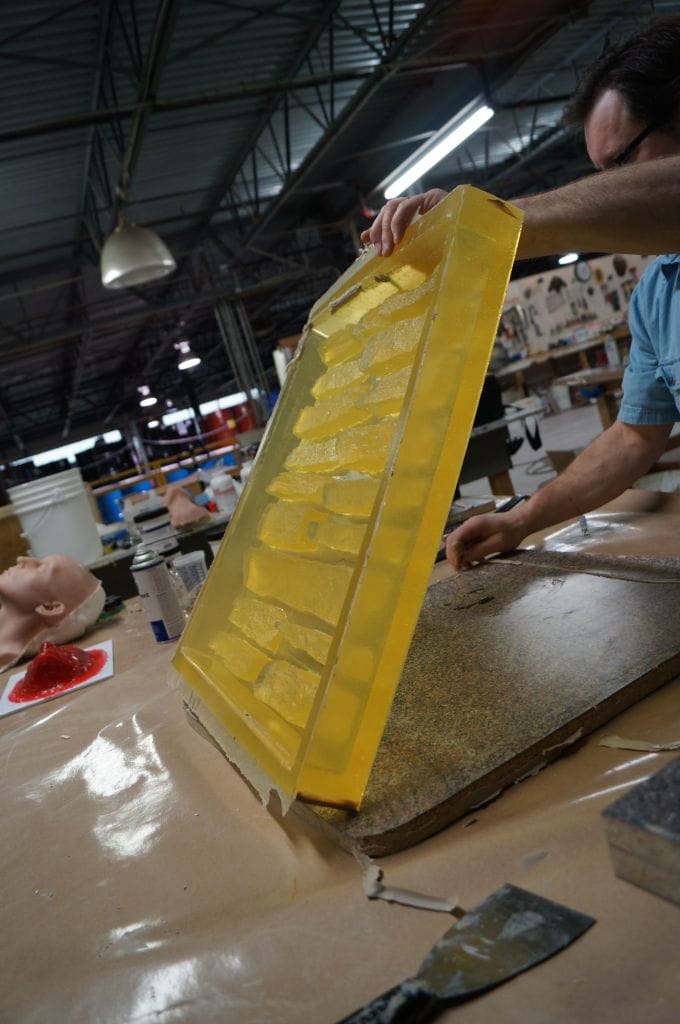
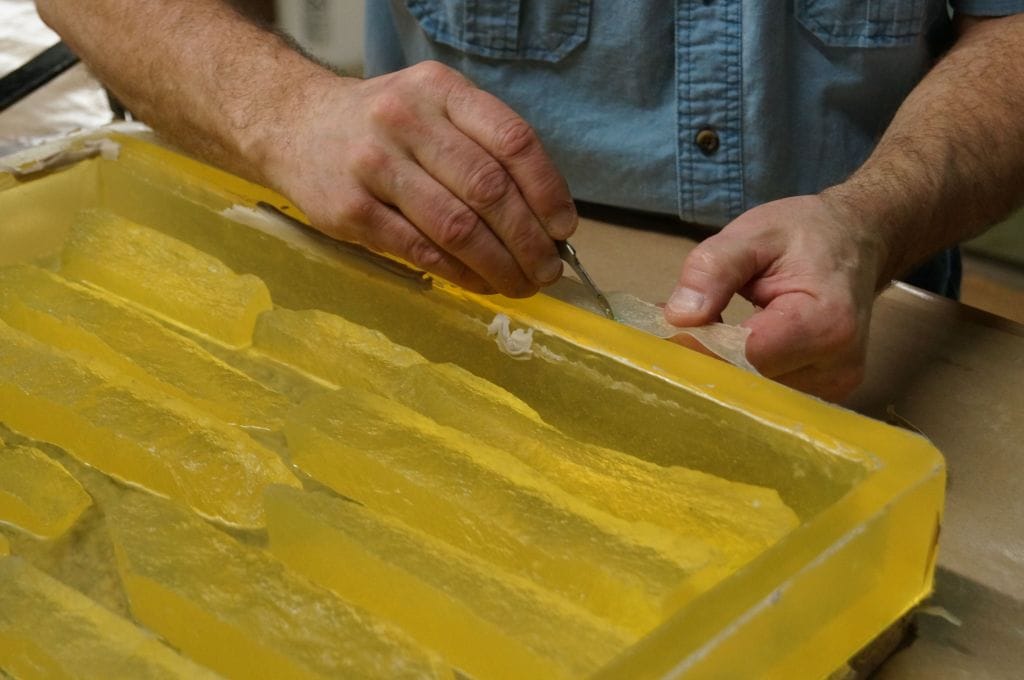
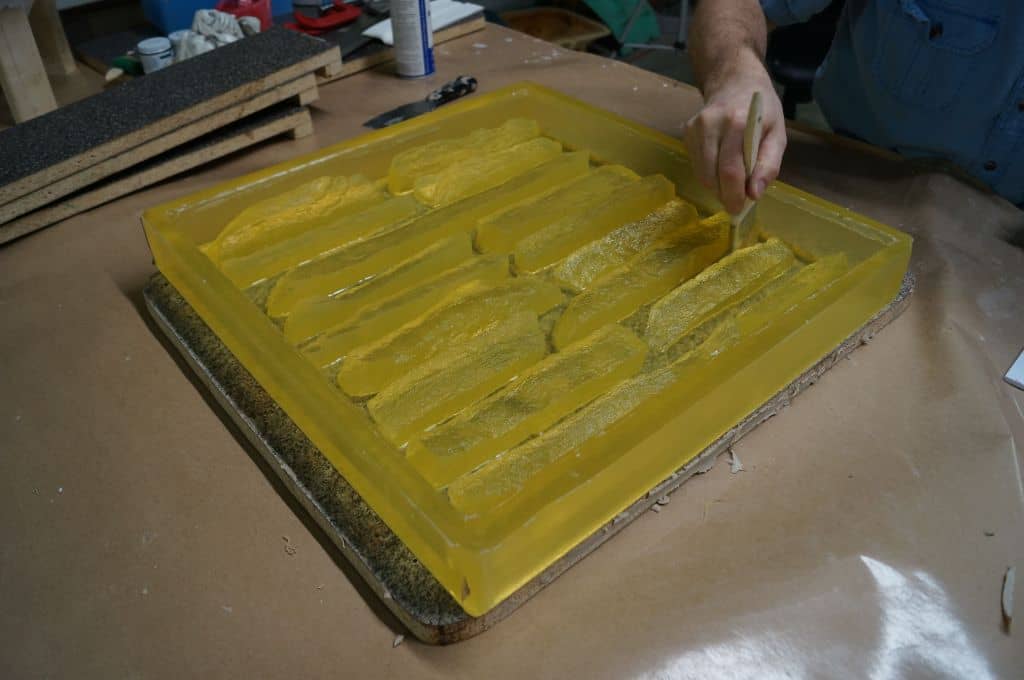
Step 6: Demold
Remove the screws from the baseboard and then remove the mold box walls; a putty knife can be helpful for wall removal.
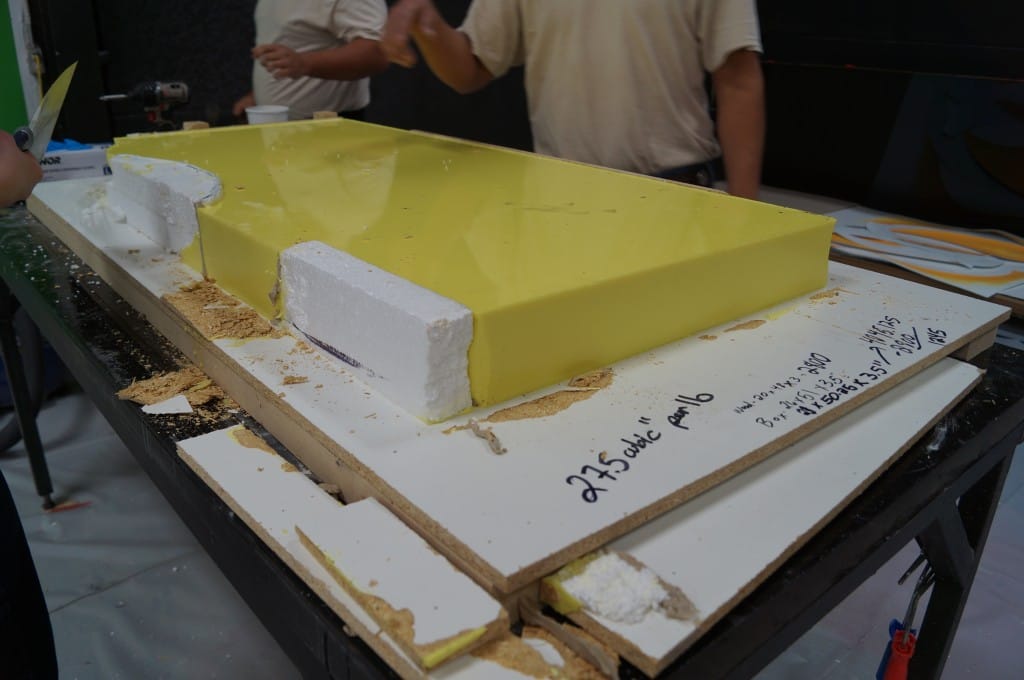
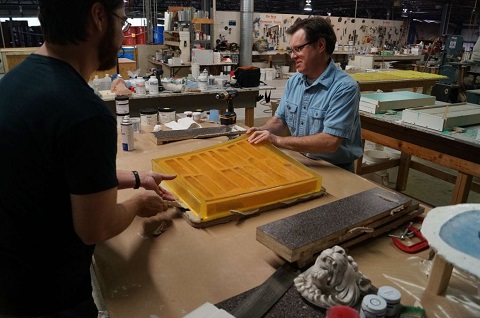
Turn the mold over for easier removal if necessary.
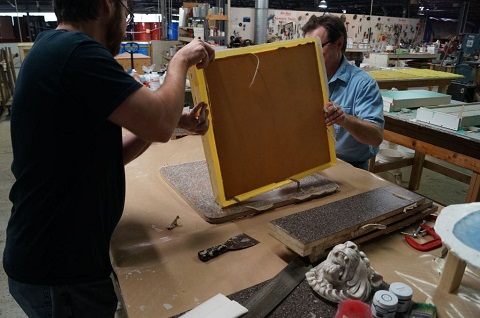
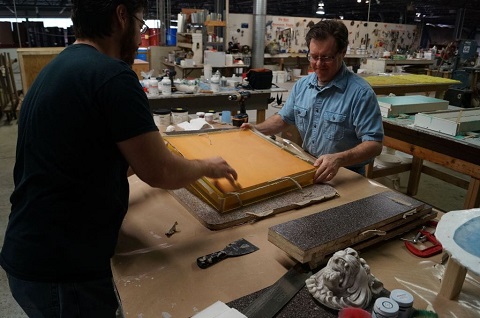
Carefully loosen the edges of the mold from the new master before removing the entire thing.
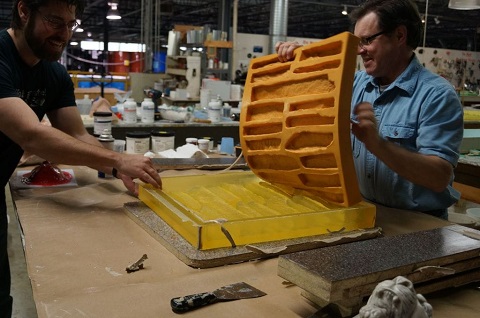
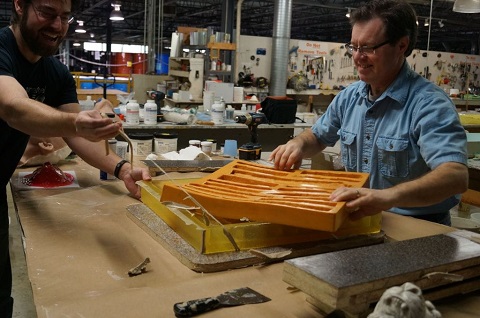
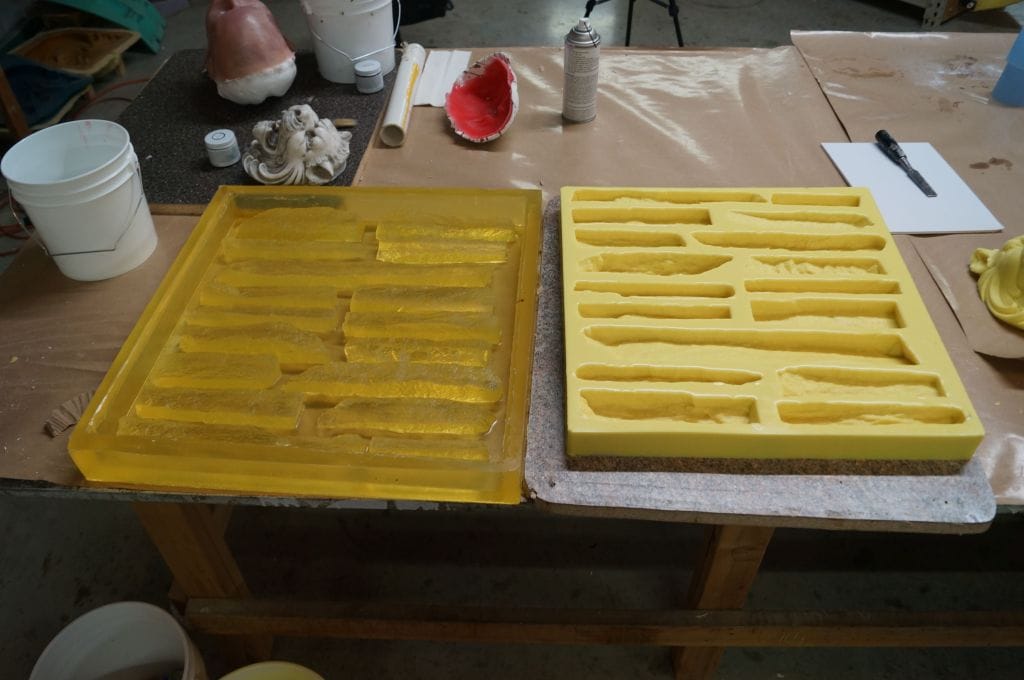
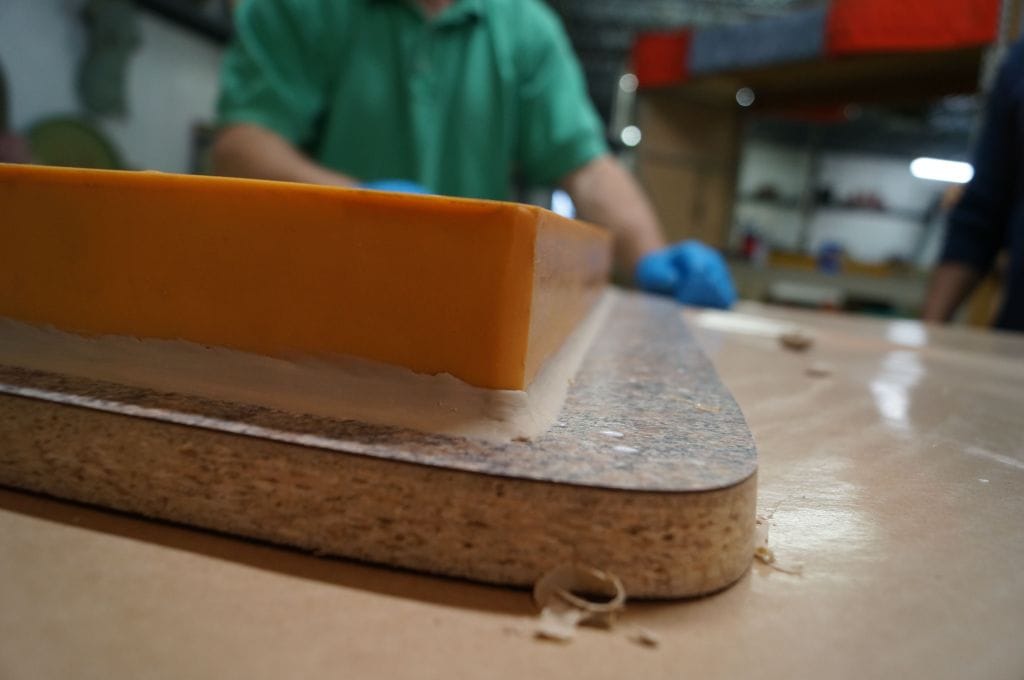
The finished permanent master with built-in containment walls:
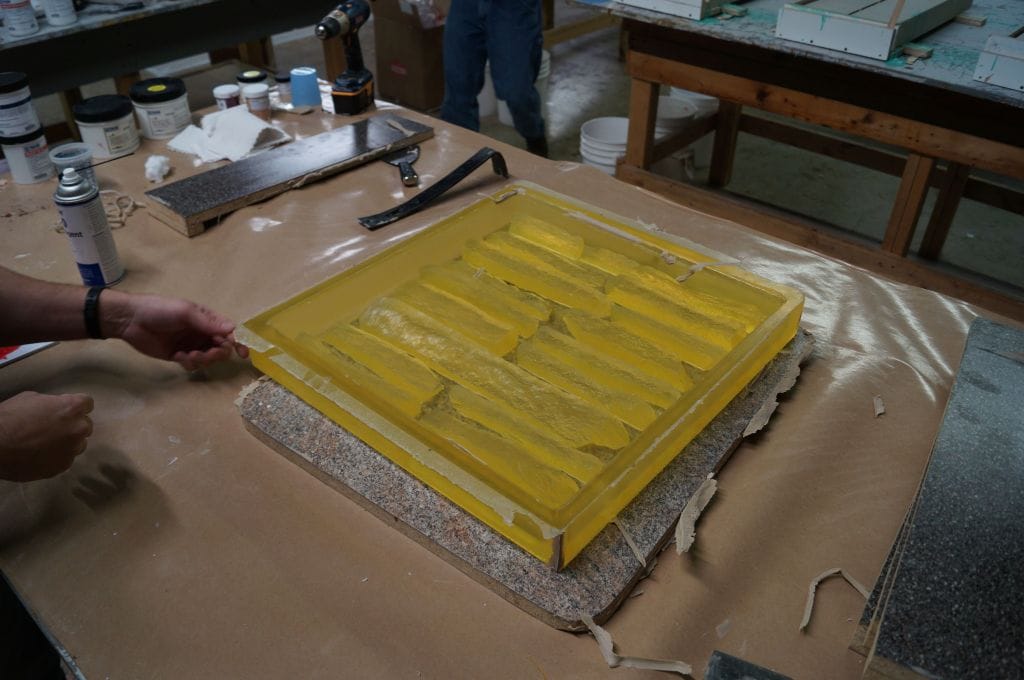
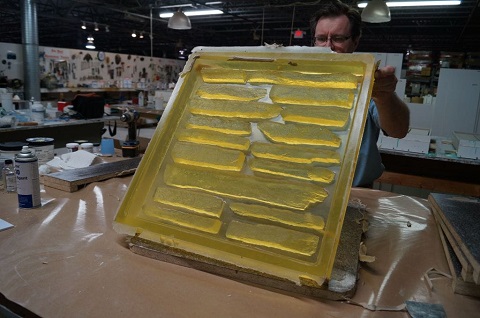
Trim the edges if necessary.
Step 7: Making a New Mold
To make a new mold of this master, first select the appropriate mold rubber. We have selected Poly 74-20 liquid rubber (the same rubber as the original mold) for this tutorial.
Poly 74-20 is soft polyurethane rubber (Shore A20) with a 1A:2B mix ratio; it is very popular for veneer stone applications.
Apply a suitable release agent (i.e., Pol-Ease 2300 Release Agent) to the master and brush it out with a dry brush.
Measure, mix and then pour the Poly 74-20 rubber onto/into the new Poly 75-80 rubber master.

Demold after 16 hours.